Optical Flow + ParticlesGPU
Updated: 2026-06*
1. Introduction
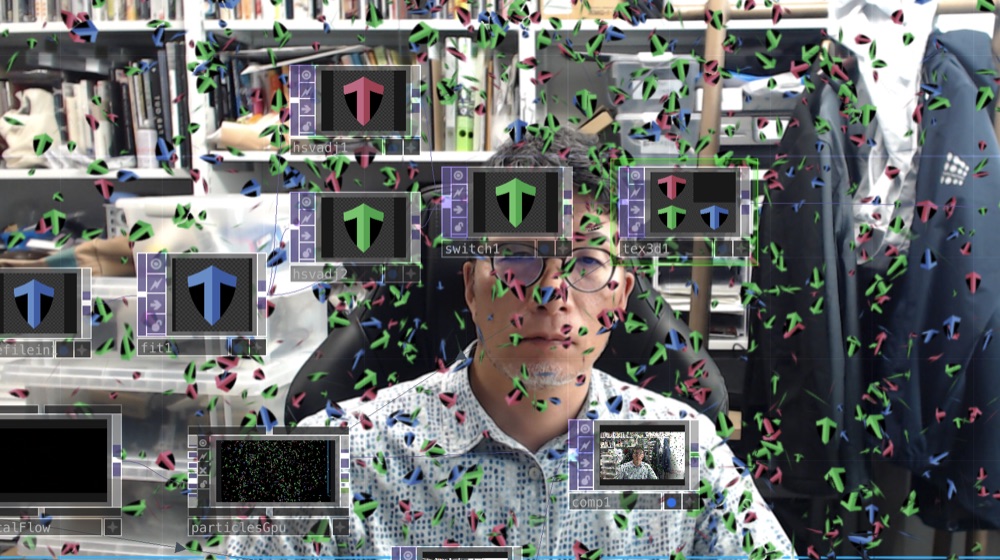
How to build interactive particles using TouchDesigner’s opticalFlow Container and particlesGpu Container from the Tools palette.
Reference tutorial:
Finished result:
Structure: first half follows the tutorial’s falling-particles version; the second half presents an original stationary particles variant (works for floor projection).
2. Launch TouchDesigner
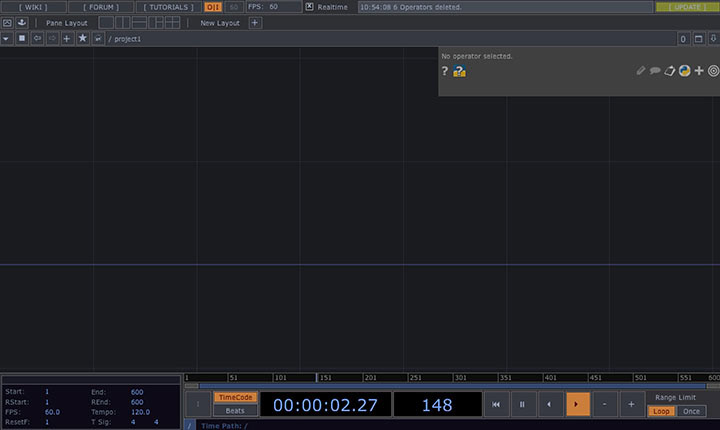
Open TouchDesigner, delete the startup operator, close the Palette:
3. Video Device In TOP
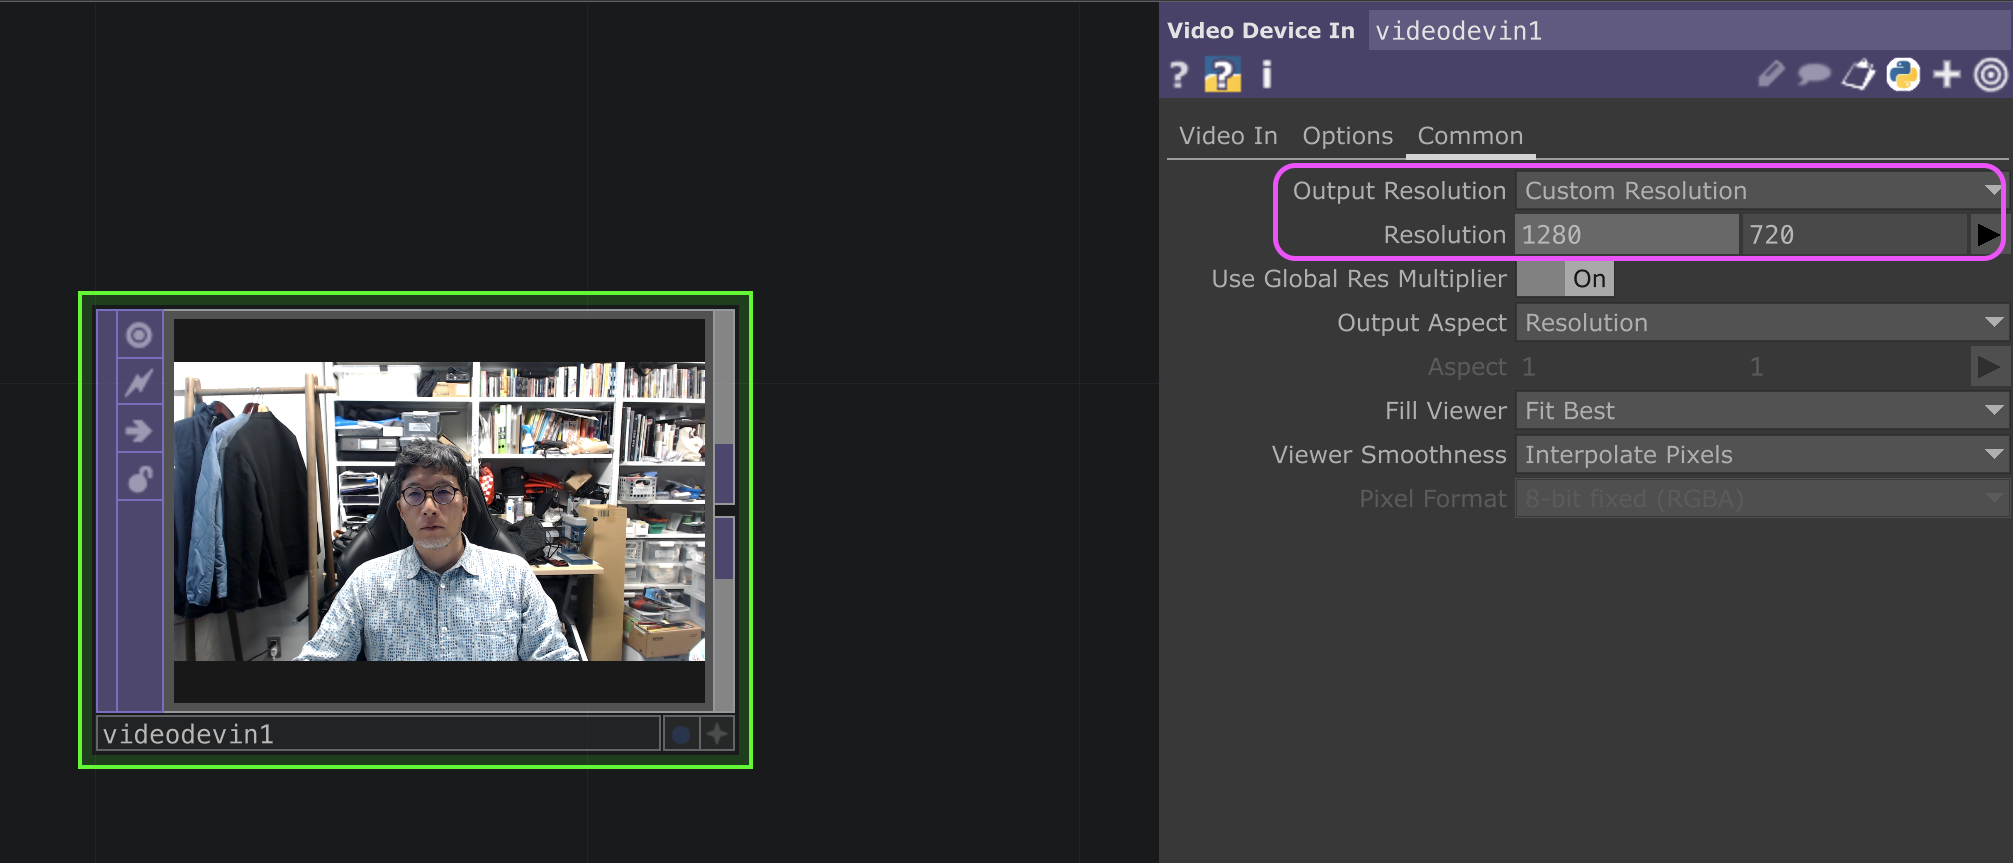
Add Video Device In TOP. In Common tab:
- Output Resolution: Custom Resolution
- Resolution: 1280, 720
4. Flip TOP
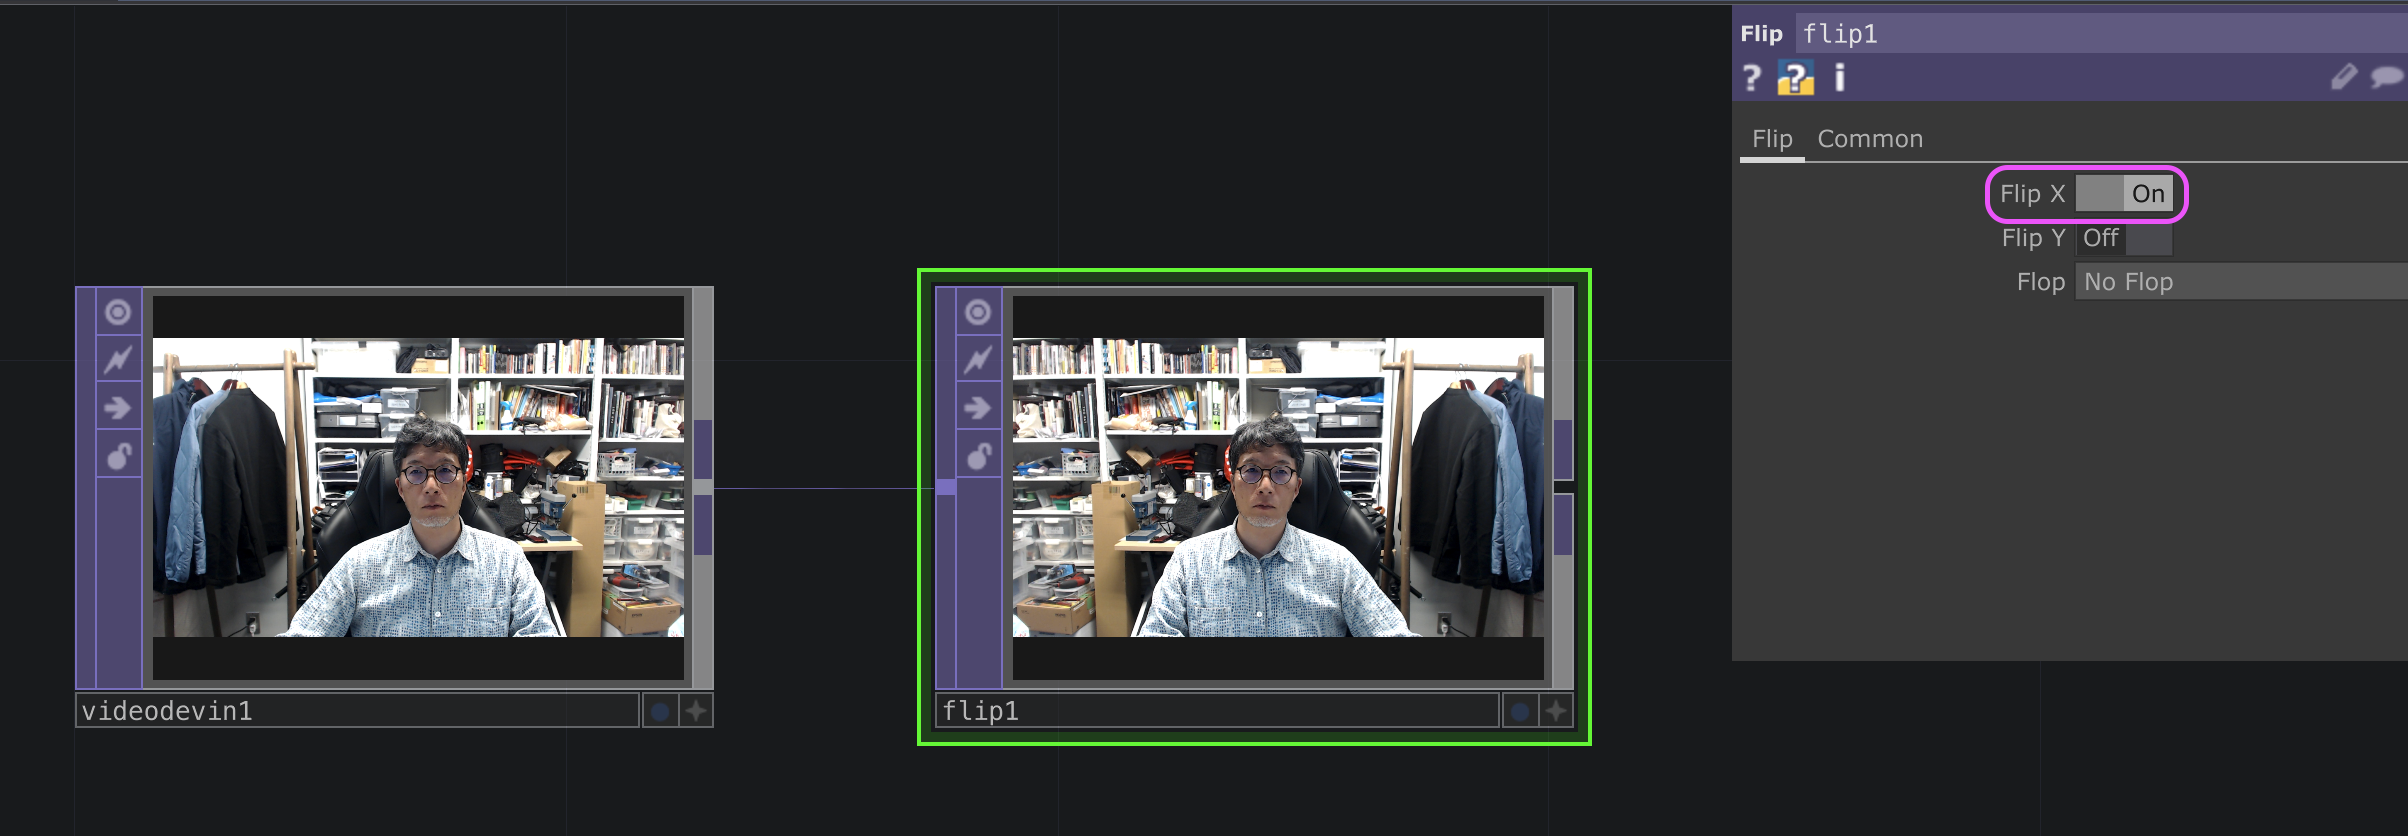
Add Flip TOP and connect to Video Device In TOP. Turn Flip X ON (horizontal mirror):
5. opticalFlow Container
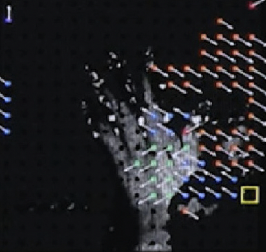
5.1 What Optical Flow is
A technique that analyzes which direction feature points in an input image are moving. The result is often encoded as color representing angles:
References:
5.2 Add opticalFlow Container
Open the Palette and drag Tools > opticalFlow Container into the network. Connect to Flip TOP:
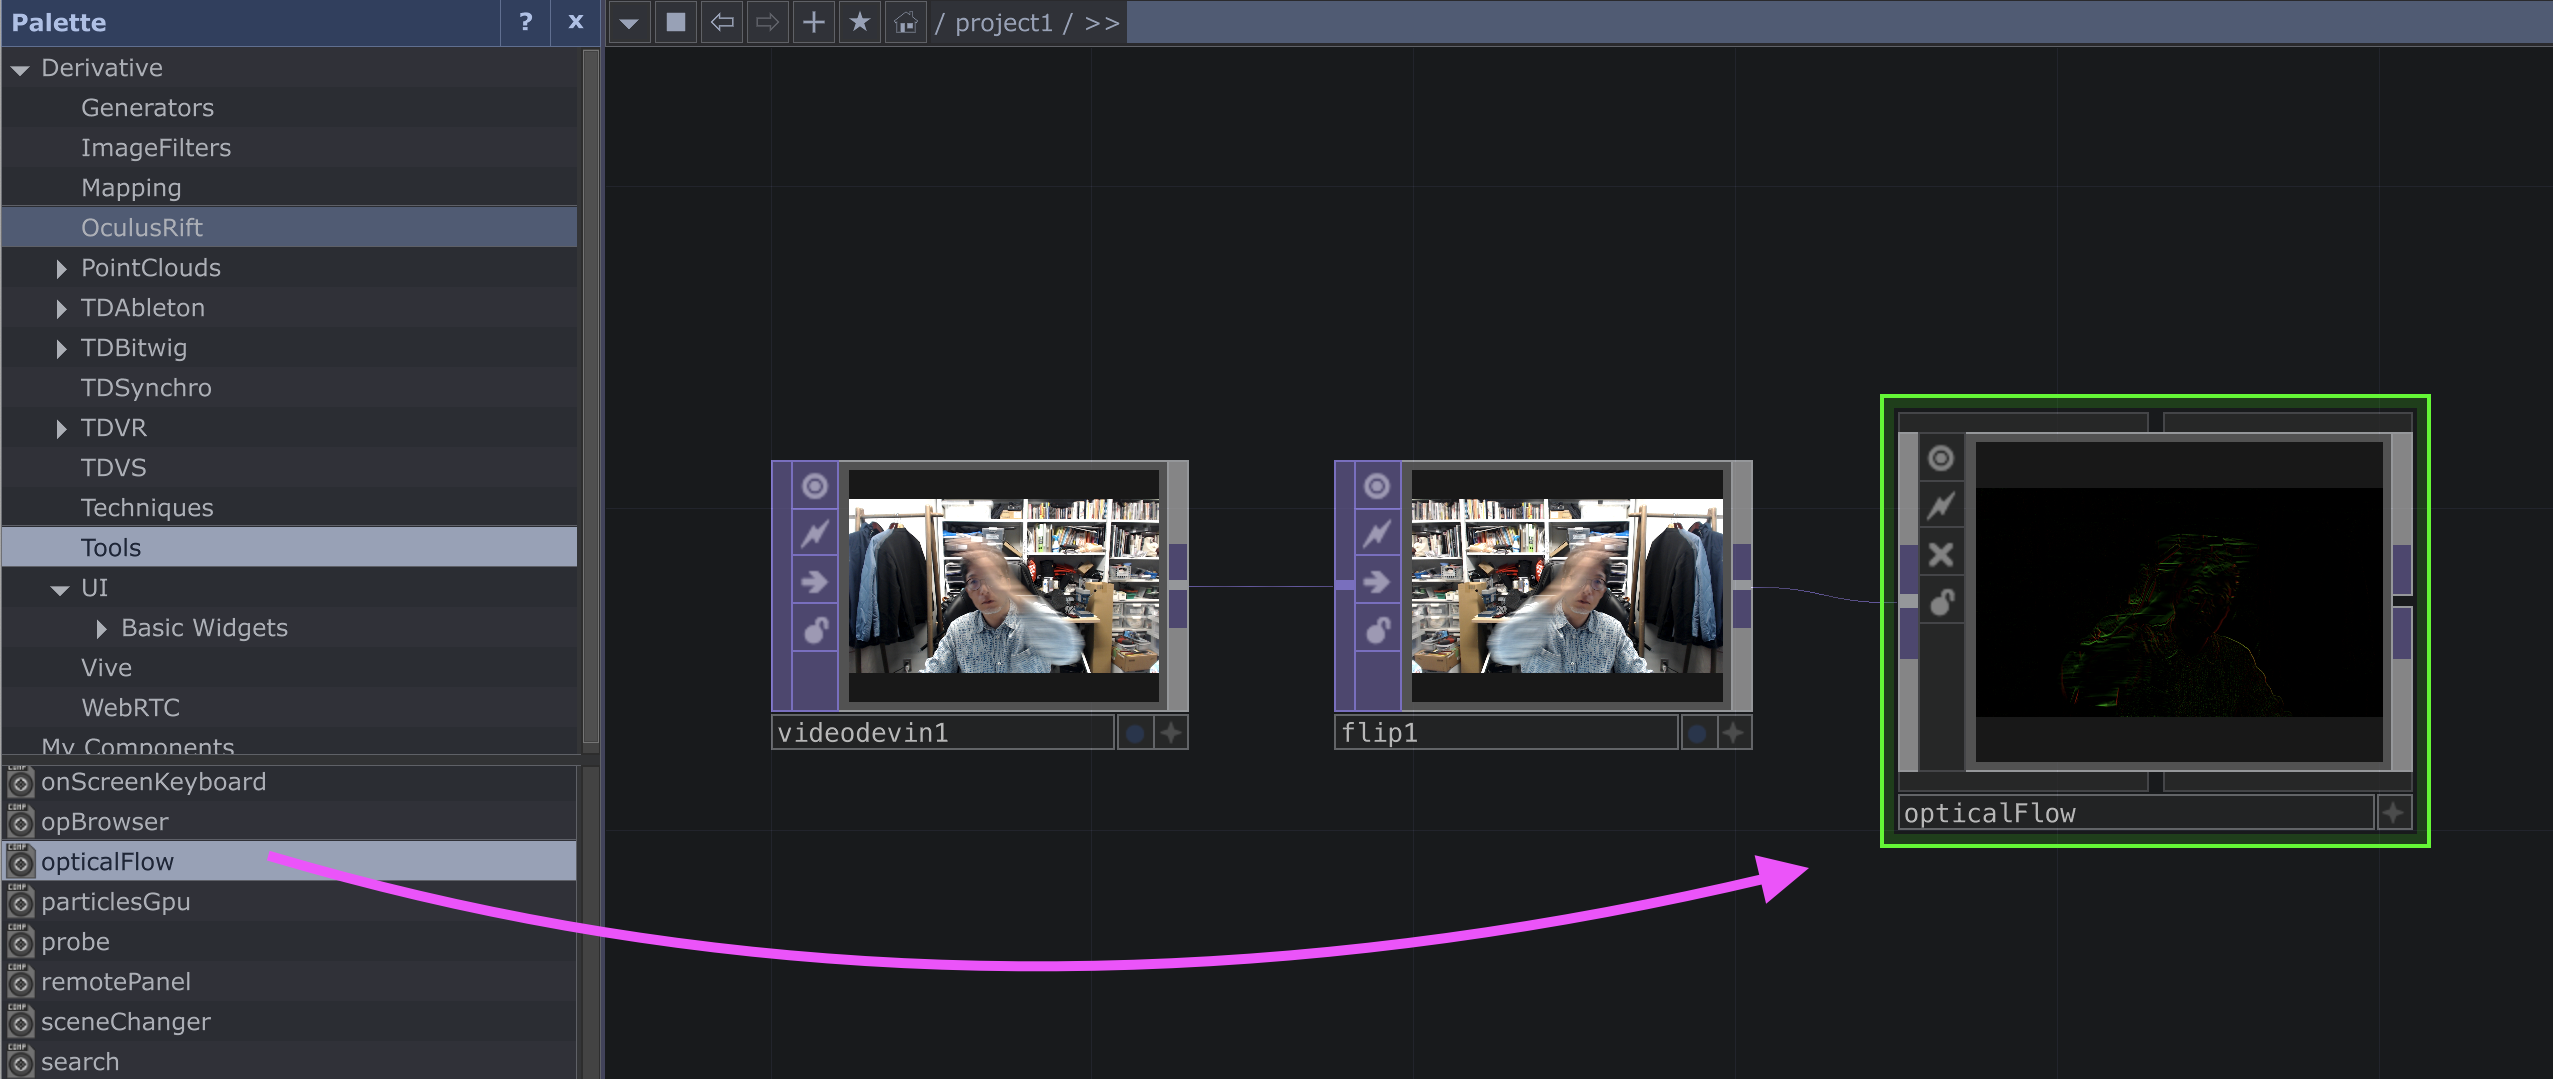
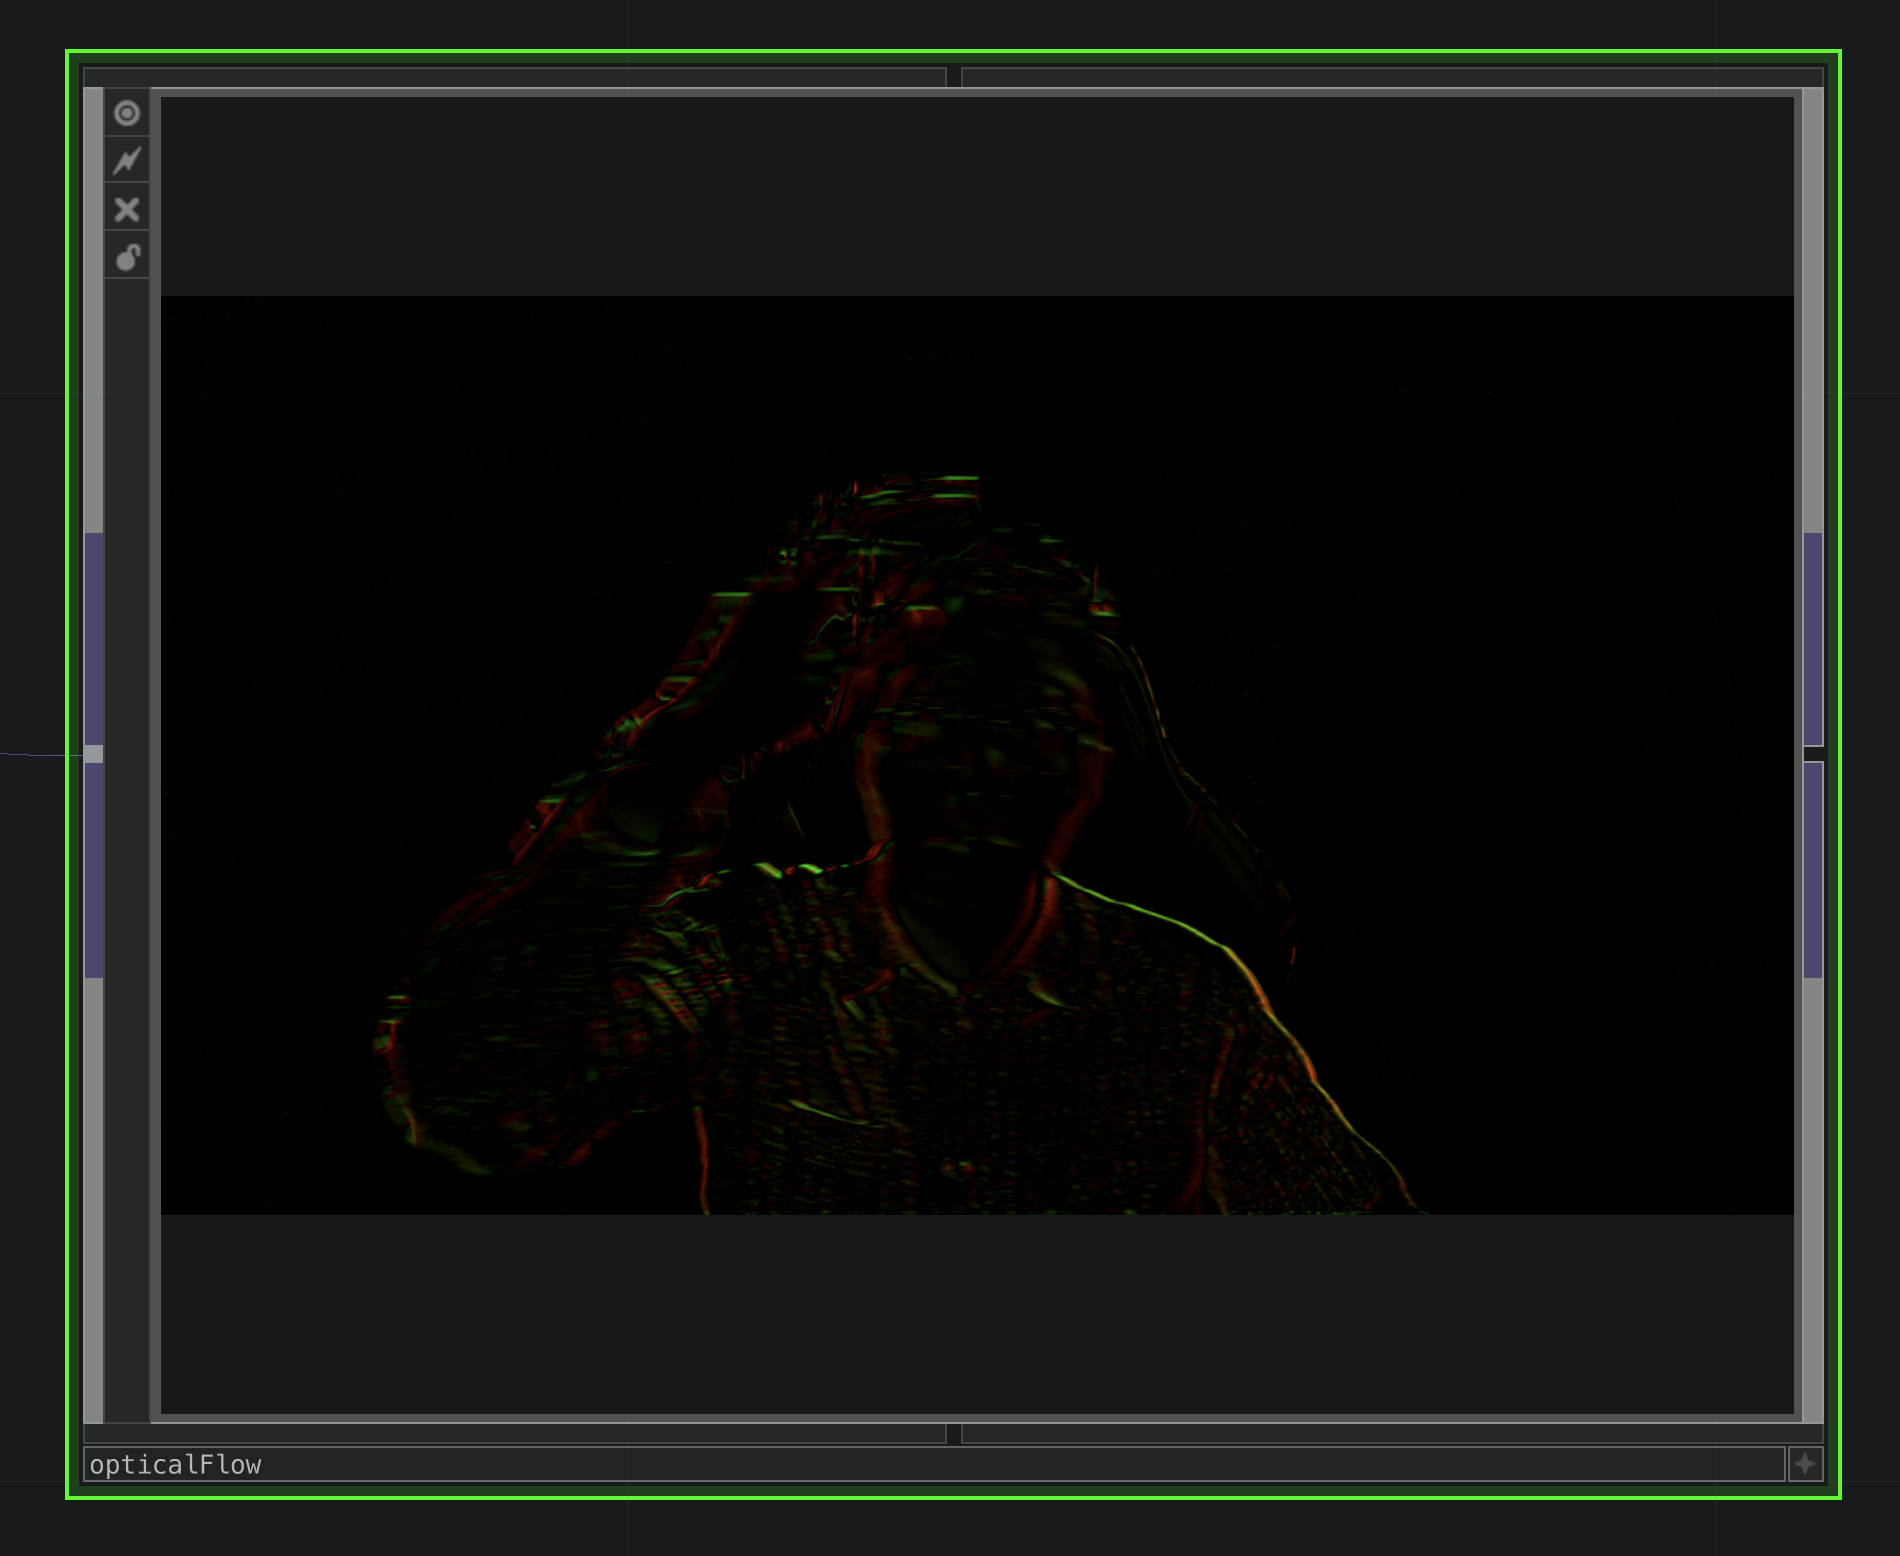
In the opticalFlow Container preview, X-direction maps to the R channel, Y-direction to the G channel:
Reference: Optical Flow TOP — TouchDesigner Documentation
6. particlesGpu Container
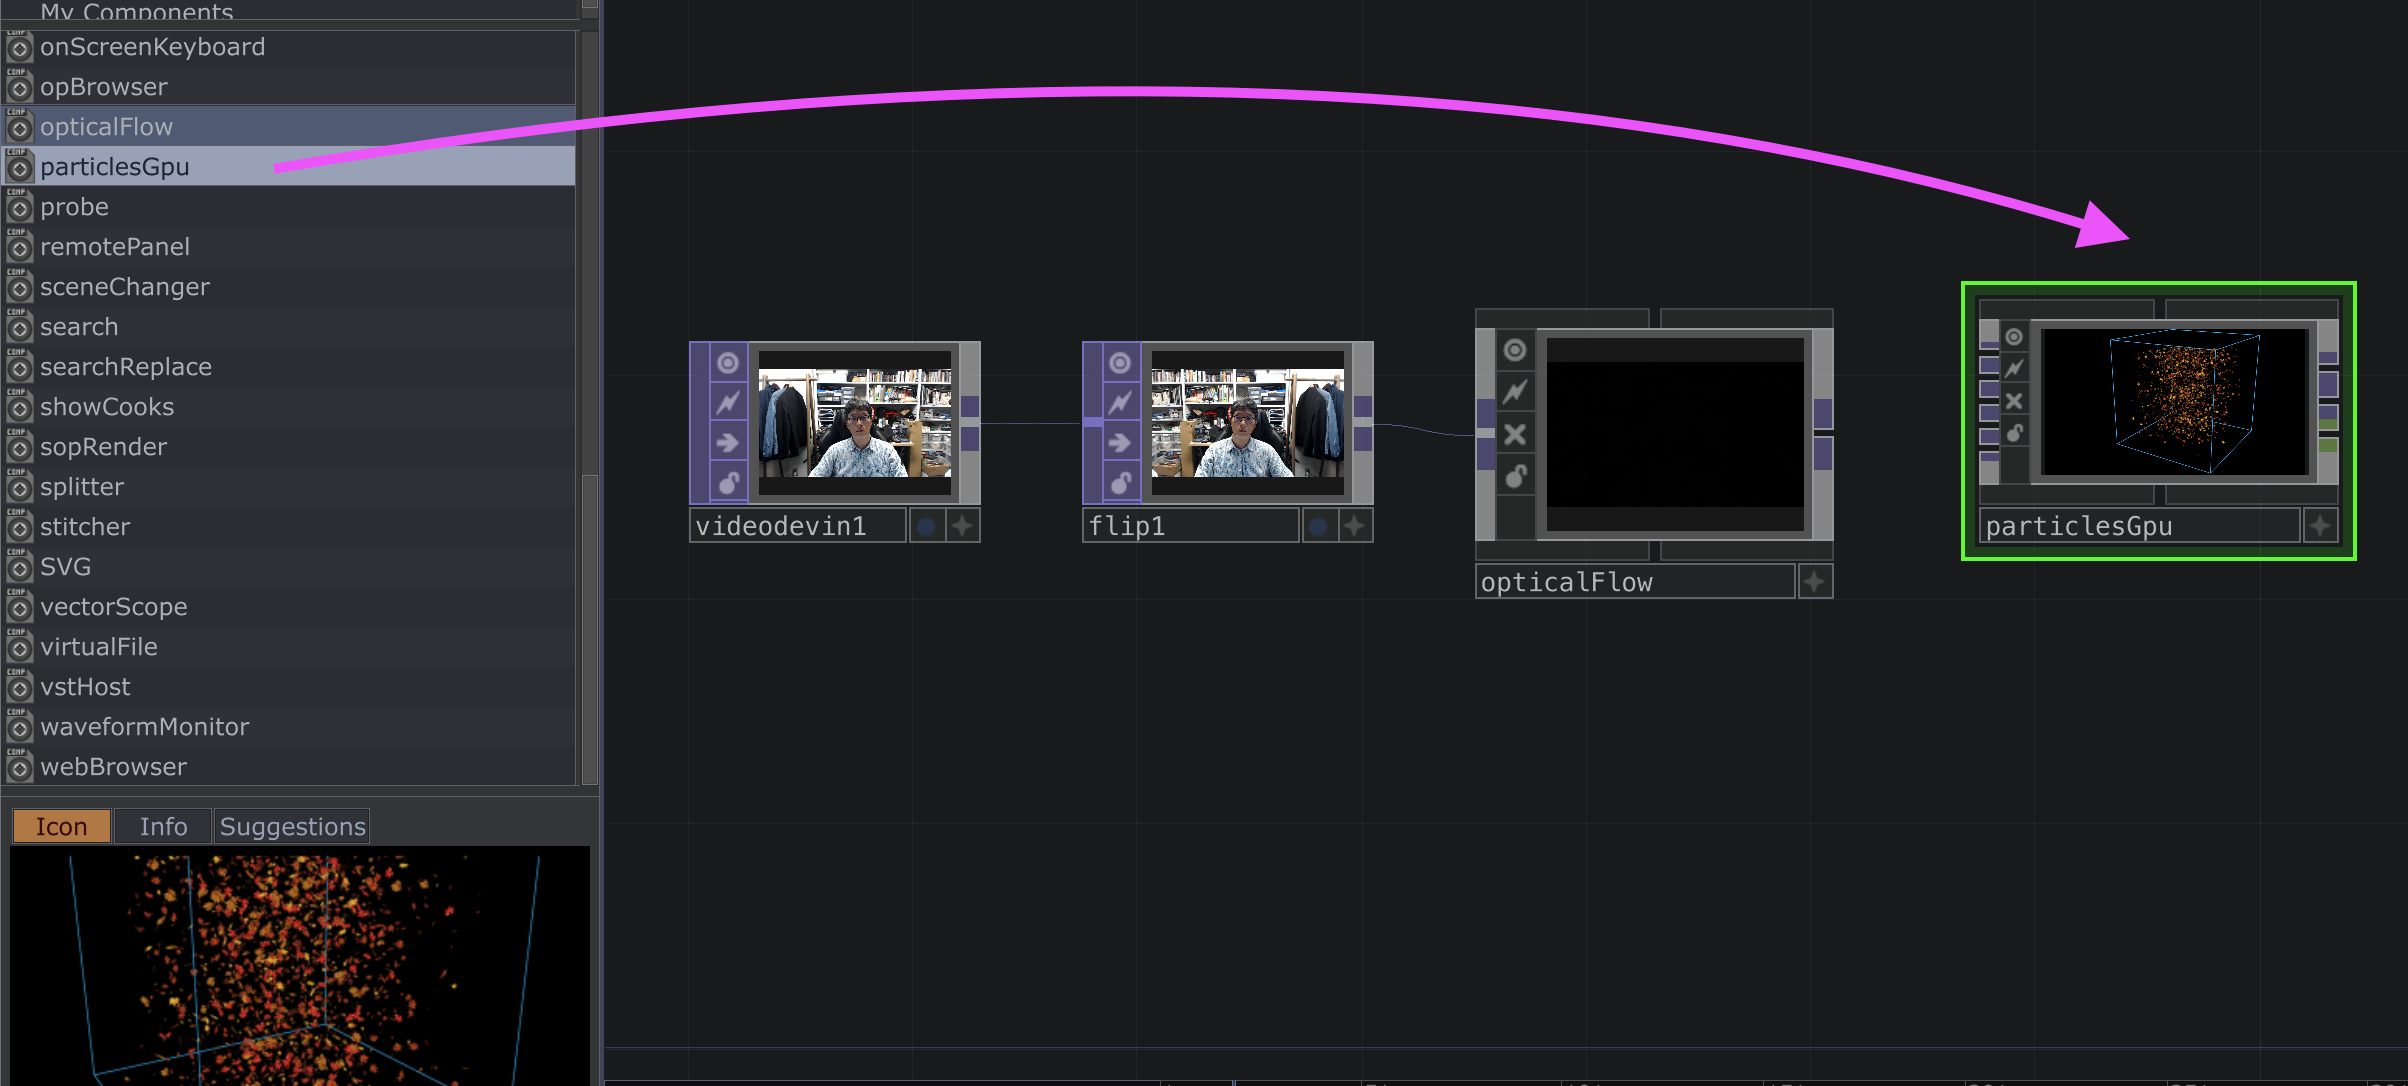
6.1 Add particlesGpu Container
Drag Palette > particlesGpu Container in (don’t connect to opticalFlow Container yet):
6.2 RGB Key TOP (transparent → black)
Add RGB Key TOP. Connect particlesGpu Container’s Output 0 (TOP) render to RGB Key TOP:
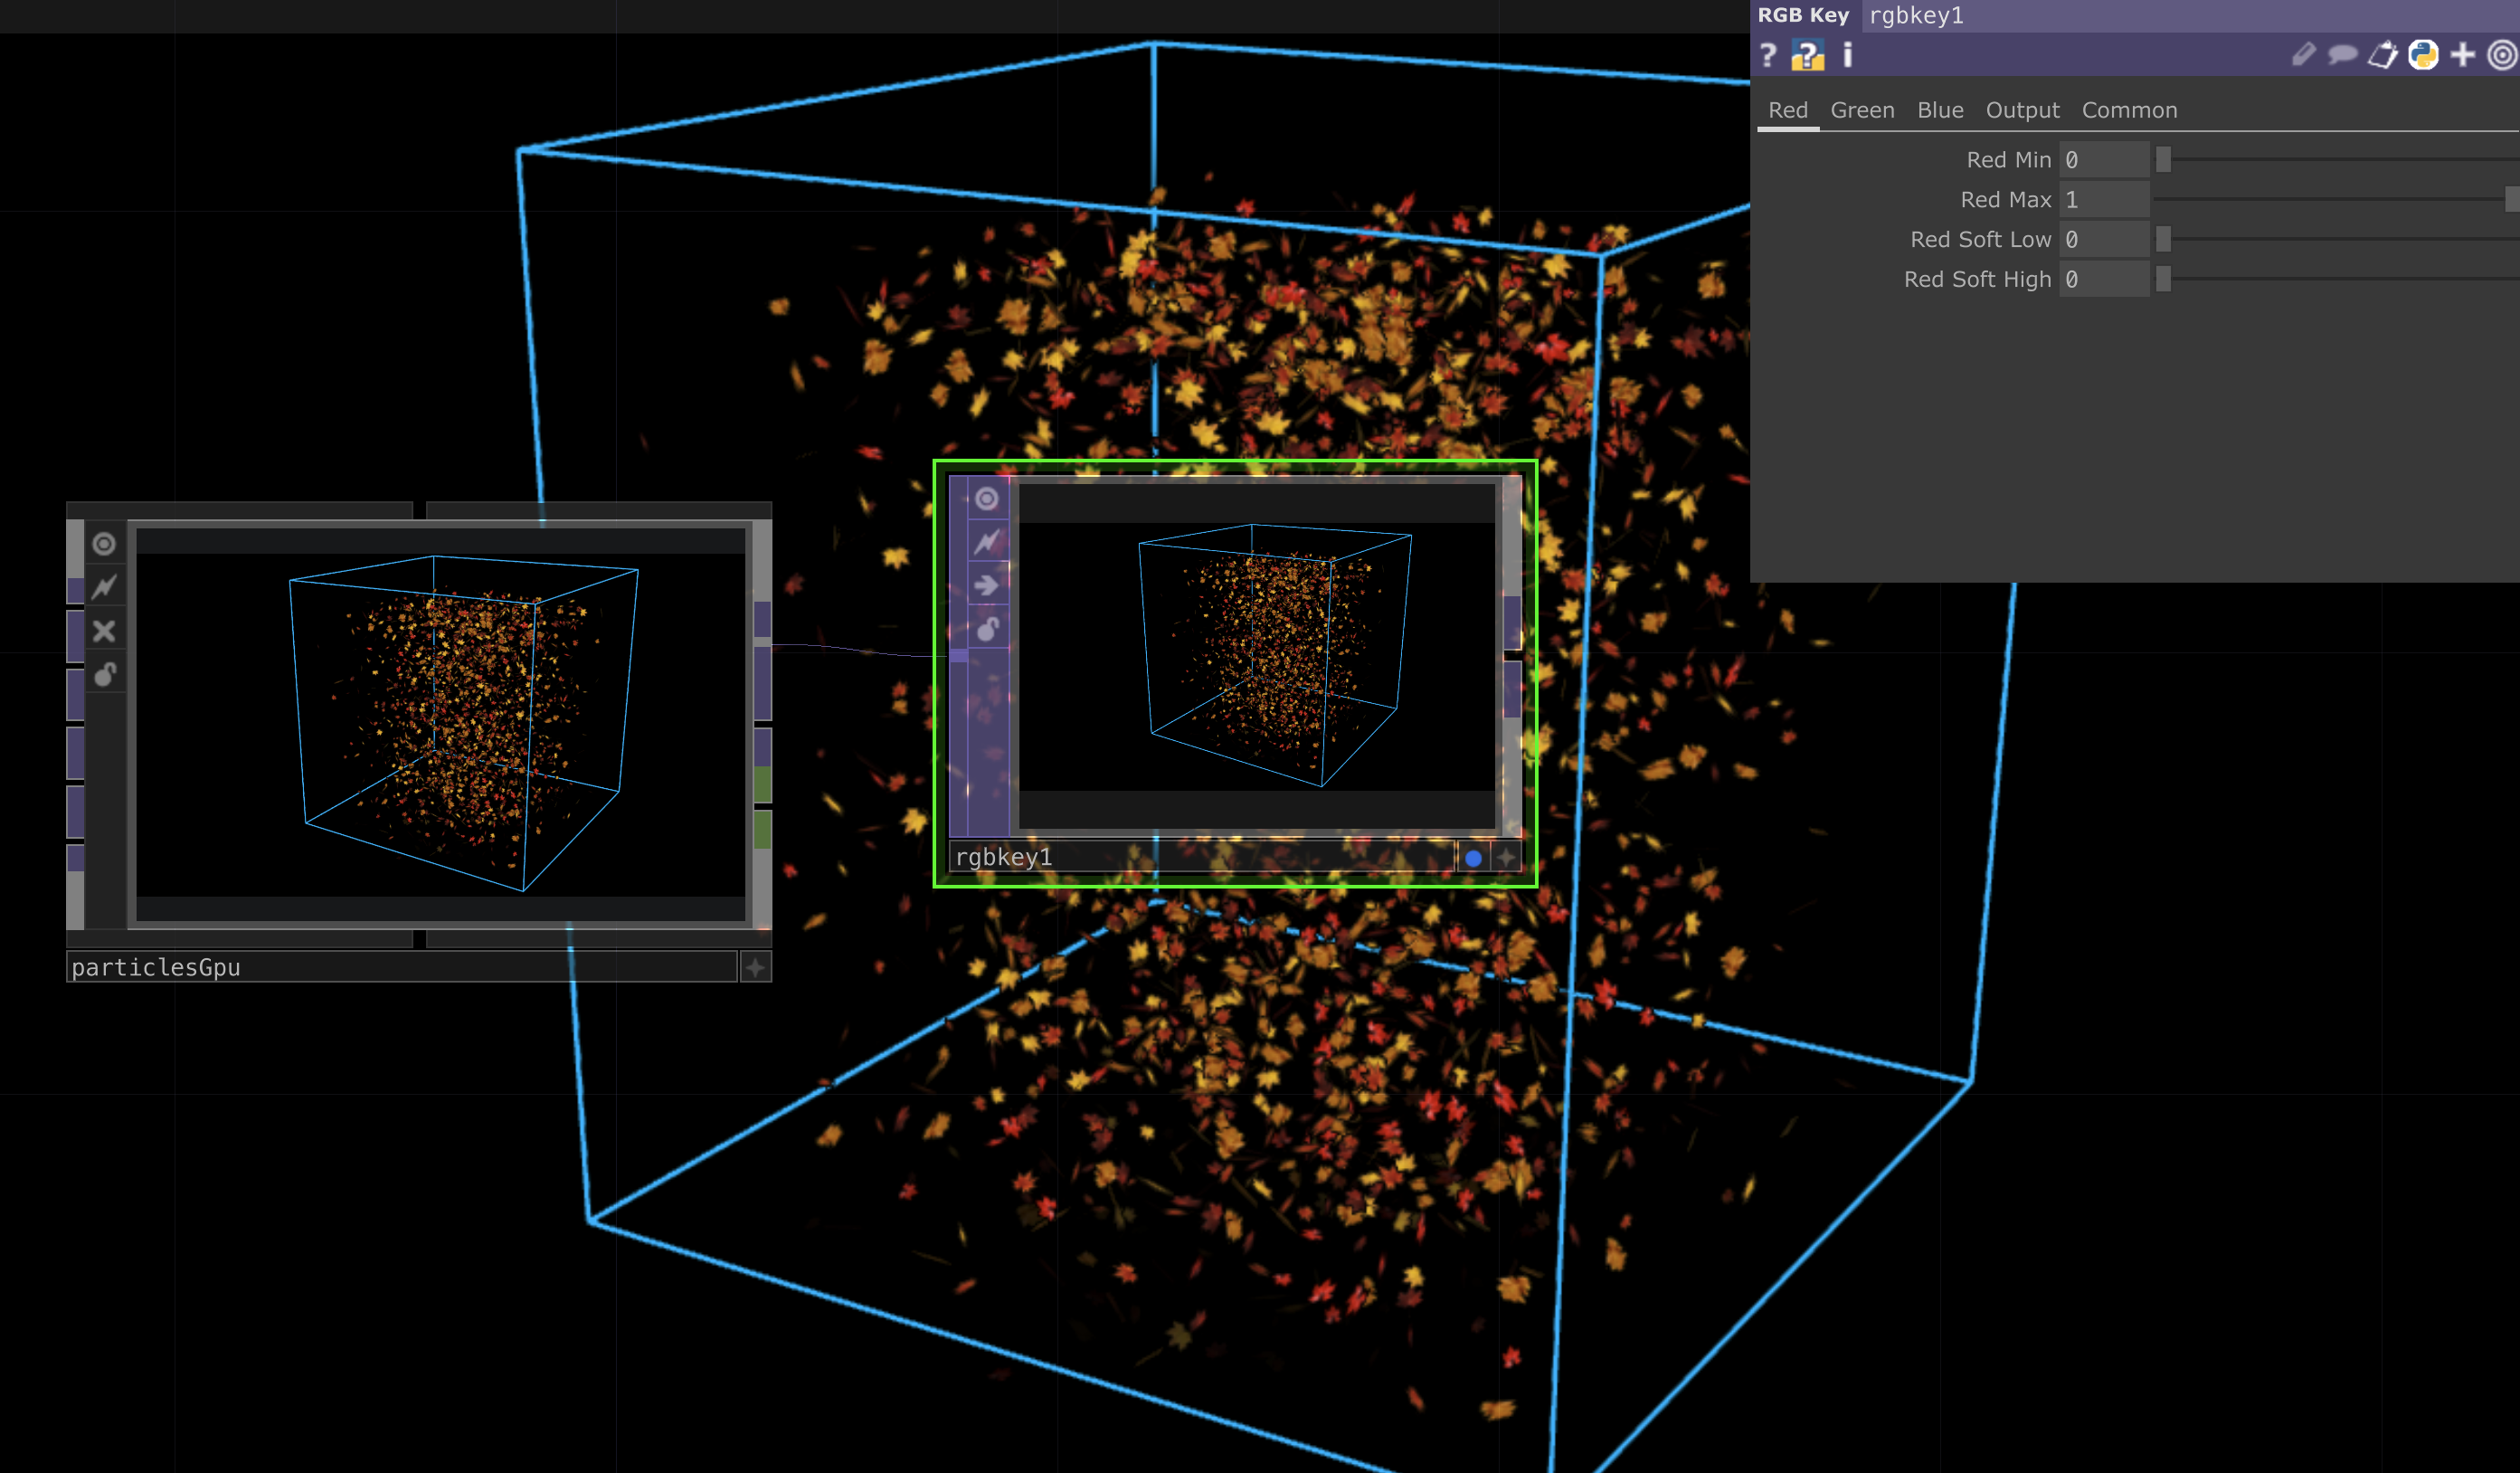
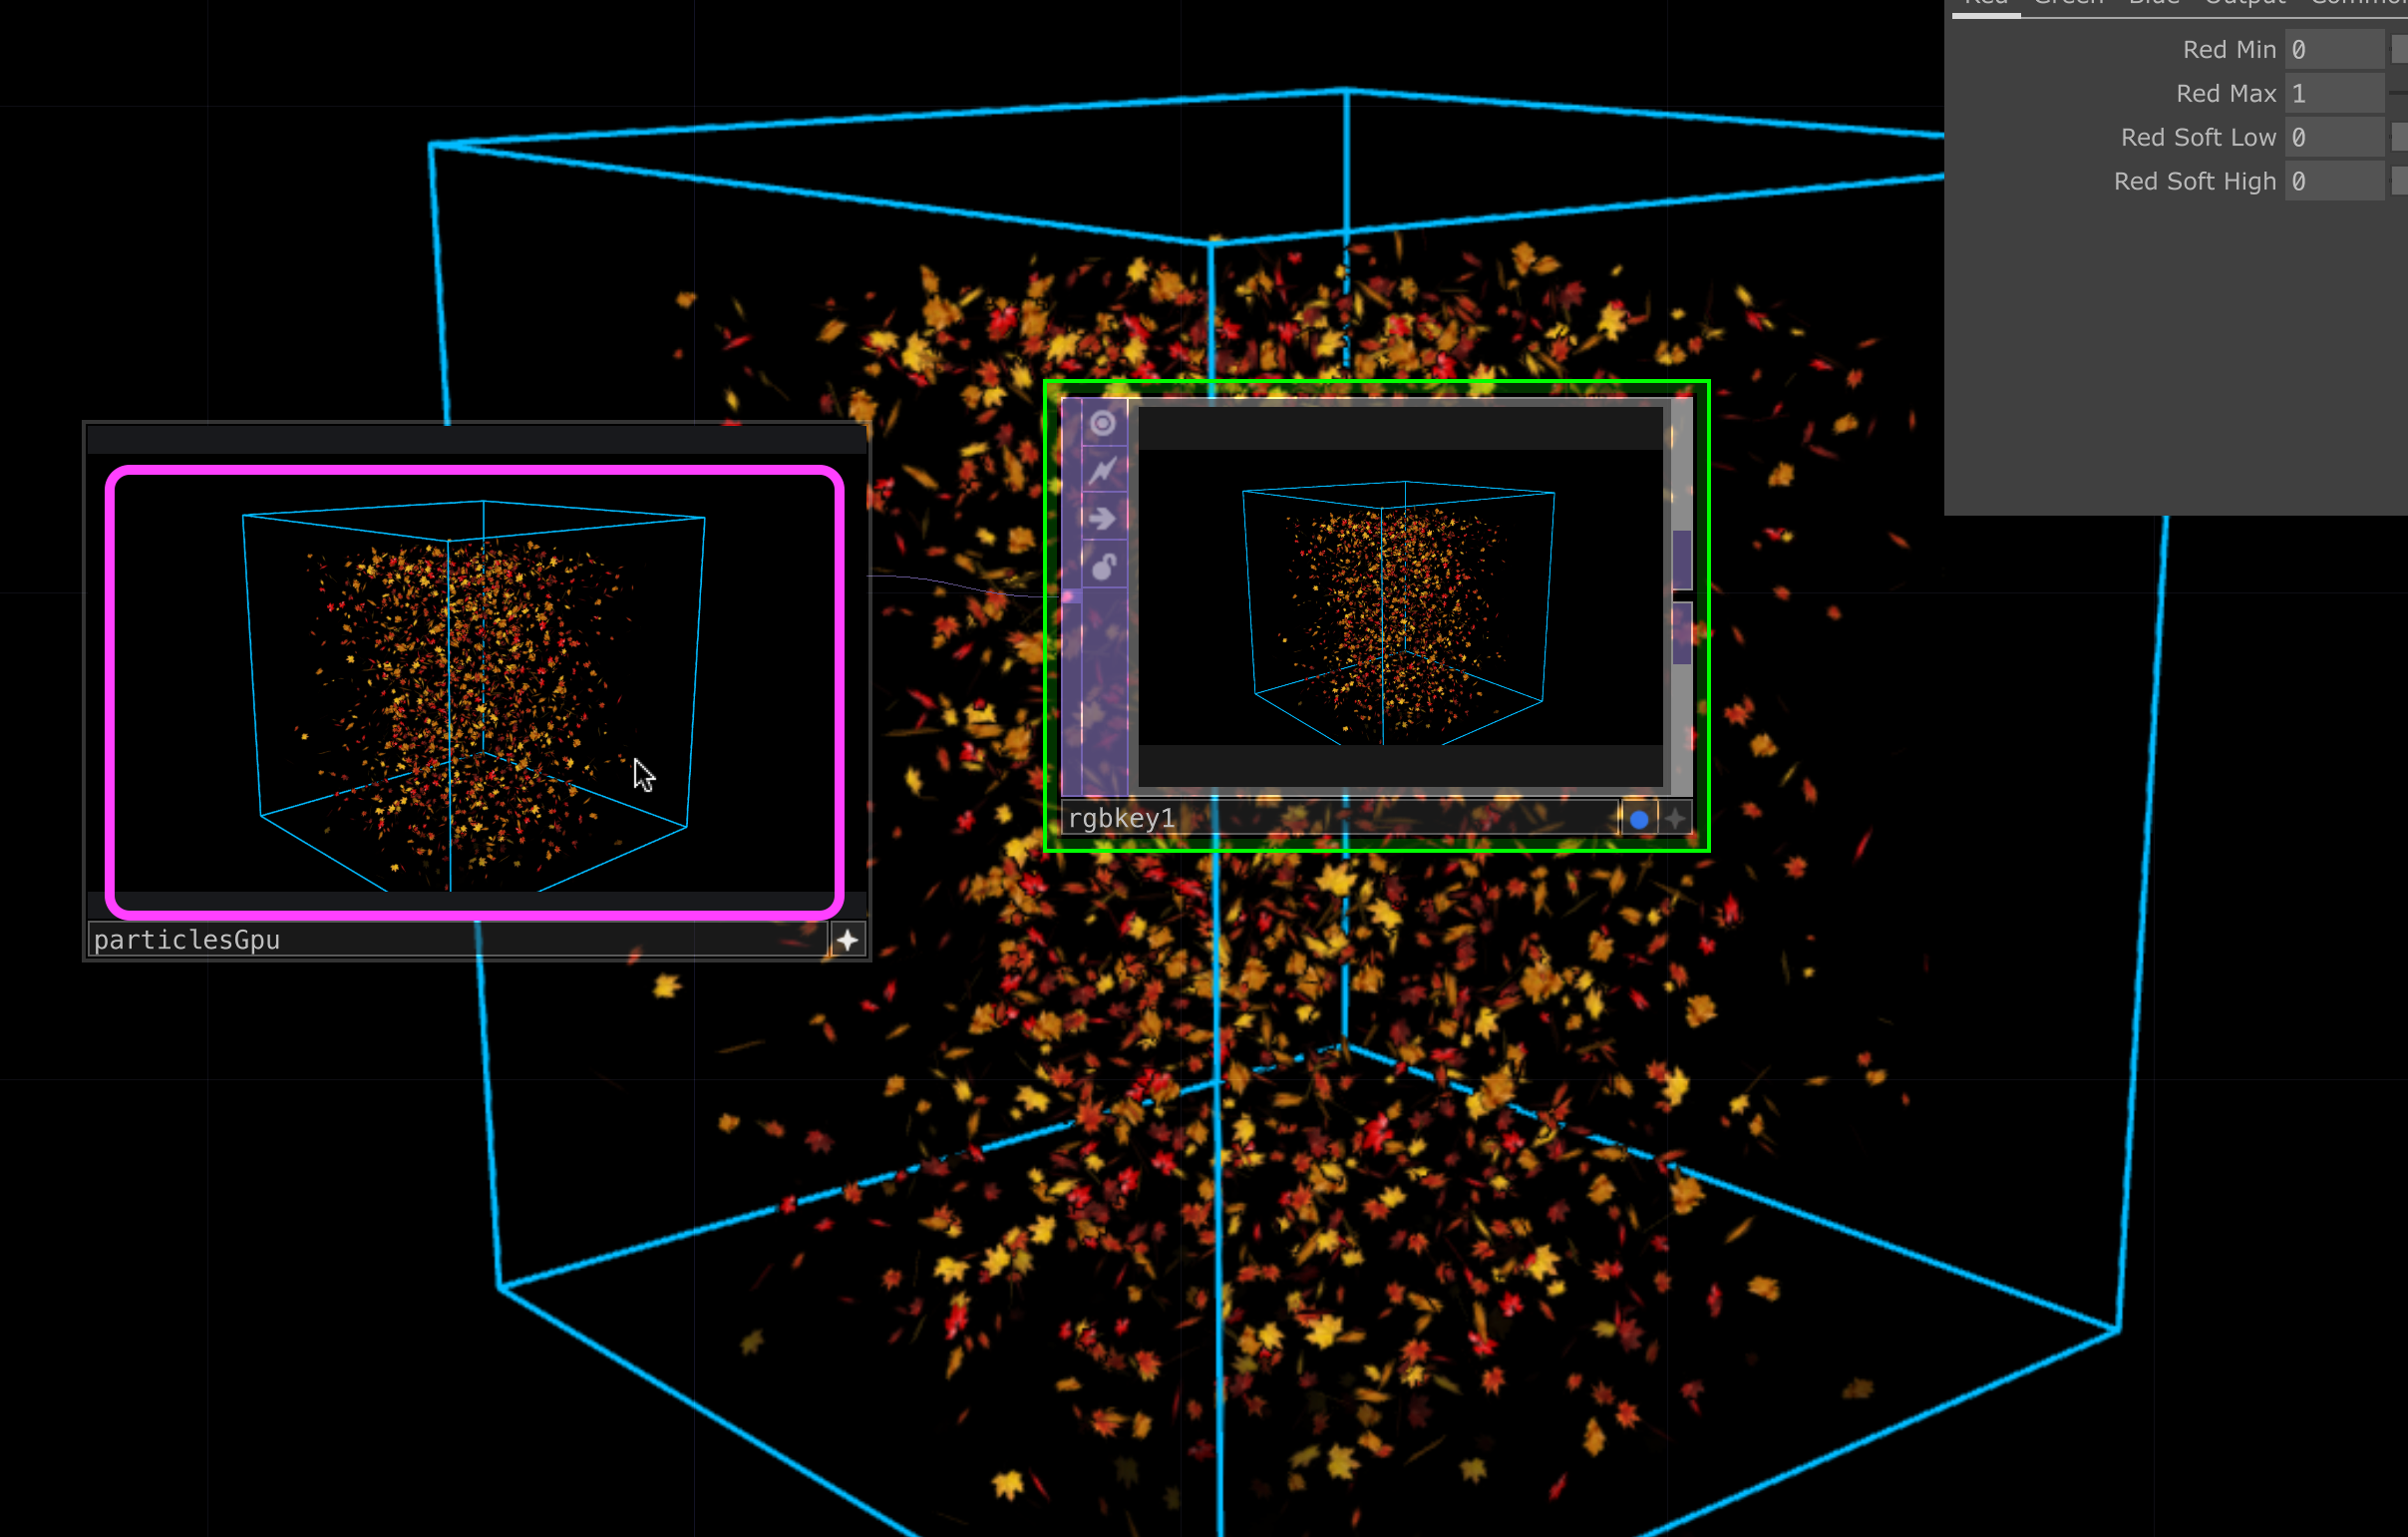
6.3 View navigation in particlesGpu Container
| Action | Result |
|---|---|
| Left drag | Rotate view |
| Right drag | Pan view |
| Middle-button drag | Zoom |
H |
Front view |
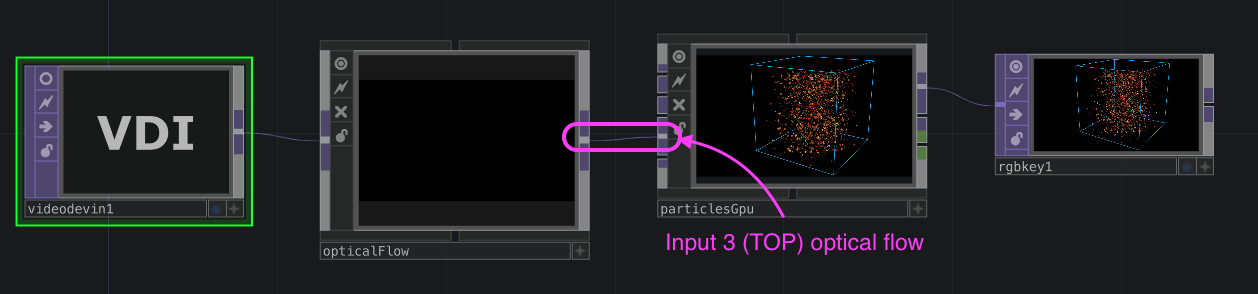
6.4 Connect opticalFlow → particlesGpu
Connect opticalFlow Container’s Out to particlesGpu’s fourth-from- top Input 3 (TOP) optical flow:
Move your body and confirm particles respond:
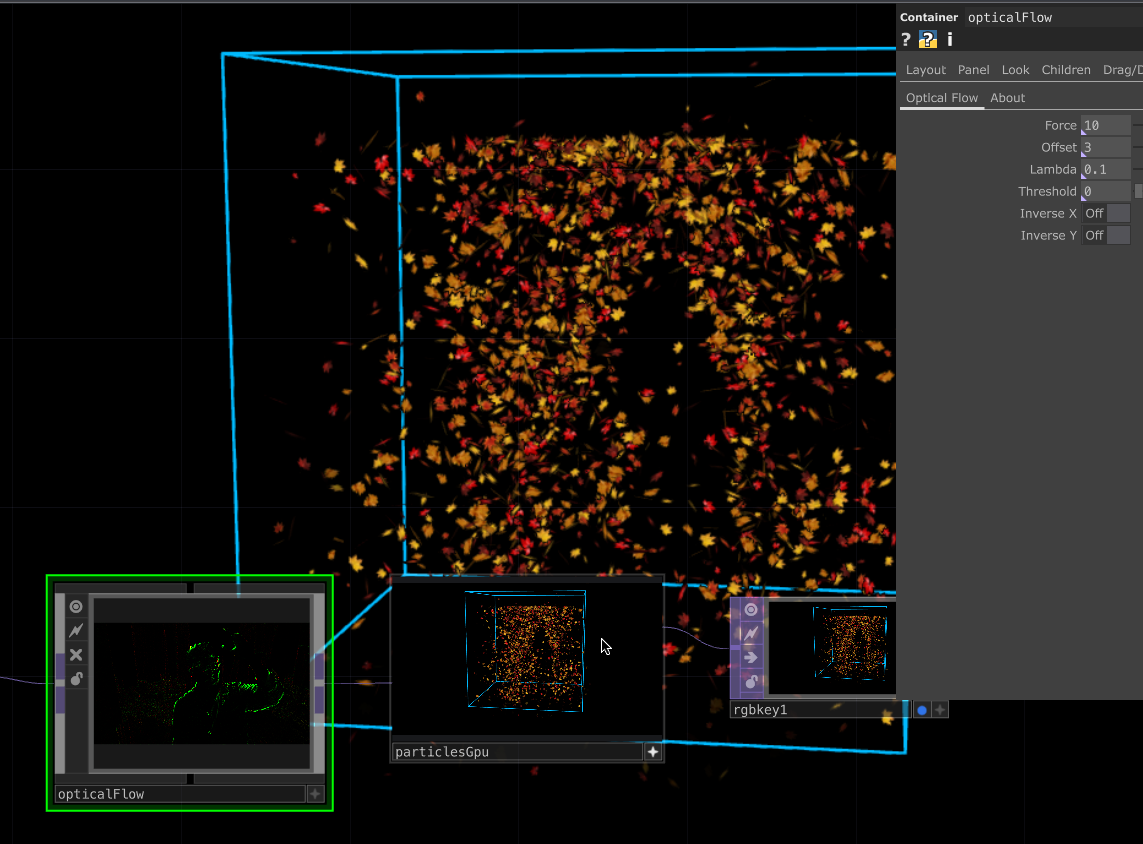
Particles spread in a 3D rectangle while the camera is 2D. The particles respond as if the camera’s 2D plane is extruded along depth.
6.5 Tuning influence
Method ① opticalFlow Container — Optical Flow tab:
- Force: 5–10 (preview edges thicken; return to 1 afterward)
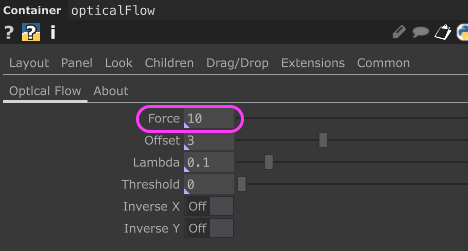
Tip: Both Containers can be entered with ENTER. Press
U(UP) to exit.
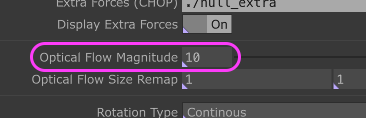
Method ② particlesGpu Container — Forces tab:
- Optical Flow Magnitude: 5–10
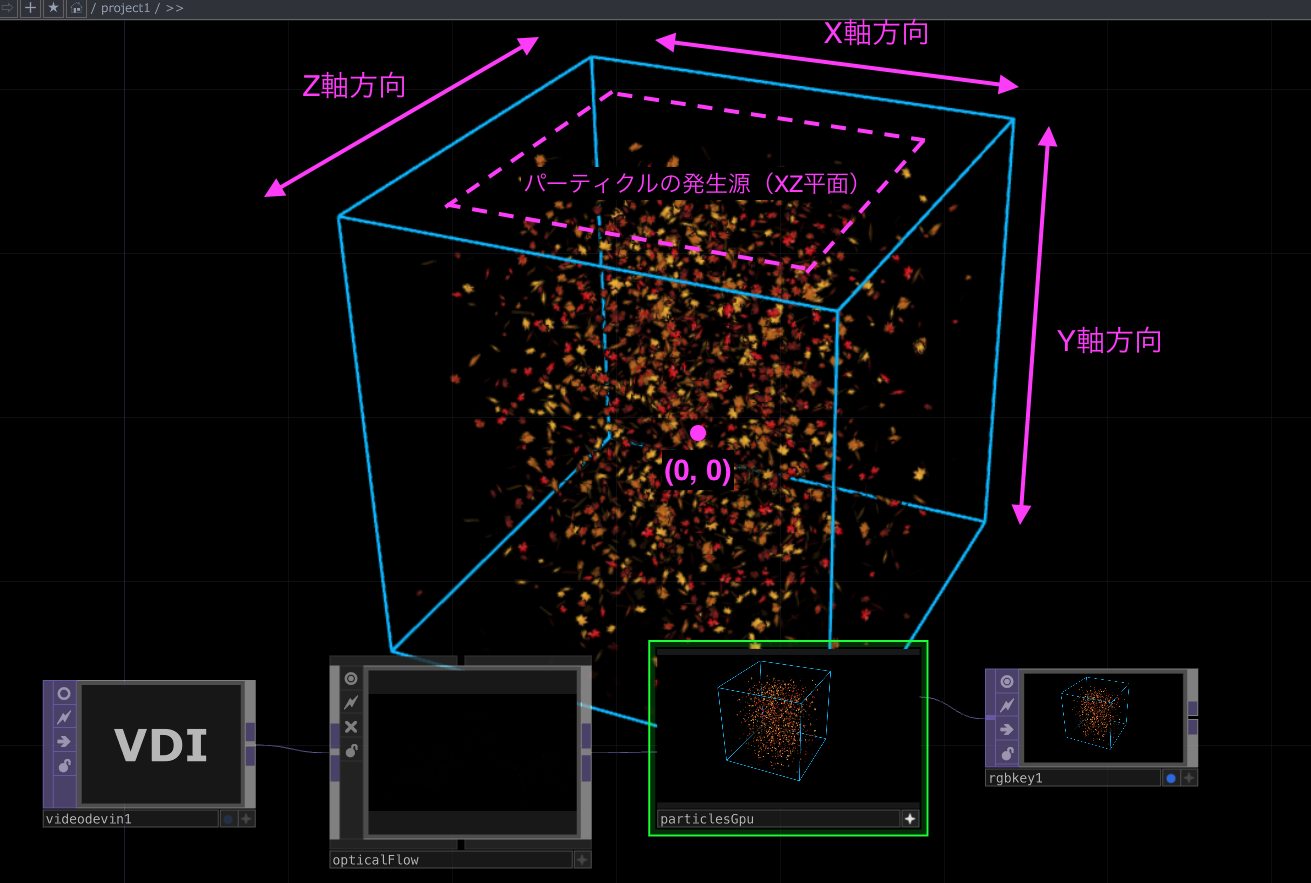
6.6 Particle emission region
Default emission is on the ZX plane:
Particle Source tab controls plane choice, size, and translation:
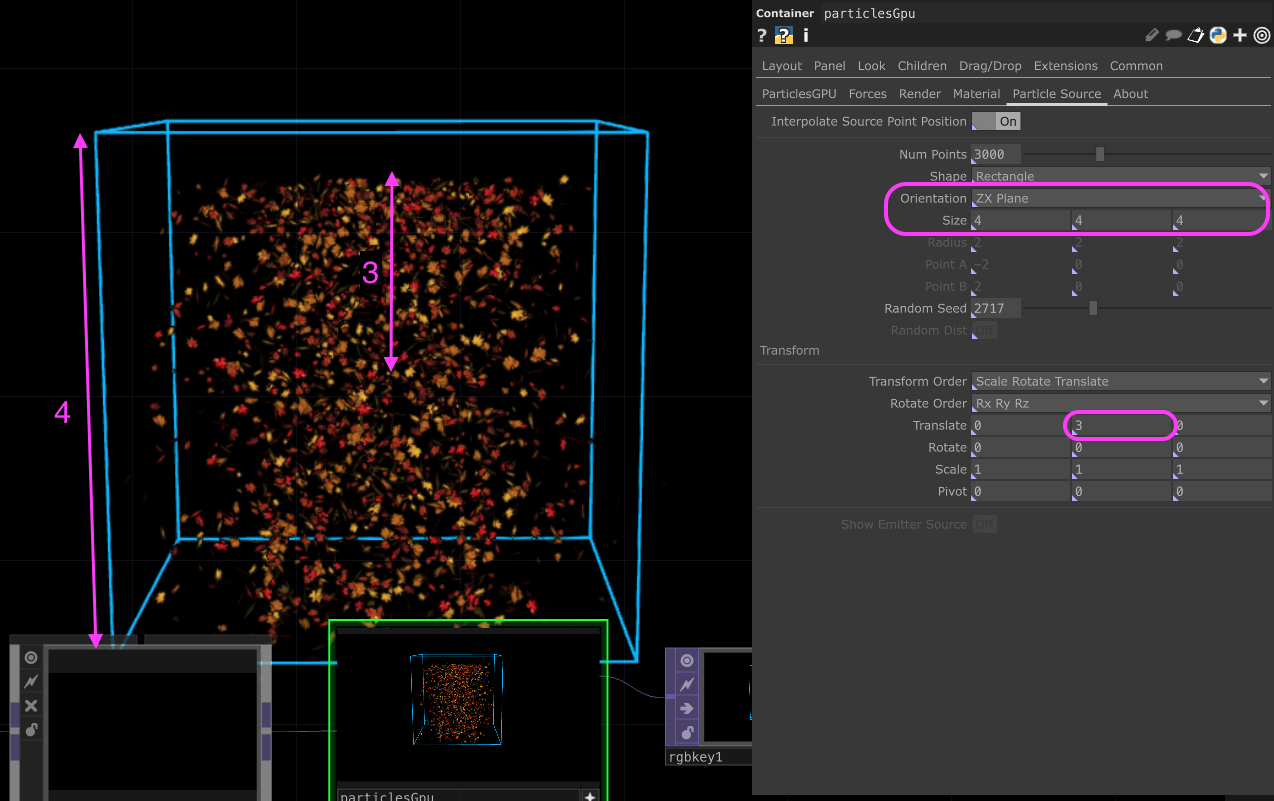
Example settings:
- Particle Source
- Shape: Rectangle → Line
- PointA:
-4 0 0 - PointB:
4 0 0
Bounding Box size is set on ParticlesGPU tab via Pos Limit Plane / Neg Limit Plane.
About Translate: at 4 it sits on the Bounding Box boundary and particles vanish (Hit Behaviour effect). Setting Hit Behaviour to None lets them fall but they don’t vanish at the lower plane.
7. Compositing with the Camera Image
7.1 Remove RGB Key
Delete RGB Key.
7.2 Select TOP (Flip TOP instance)
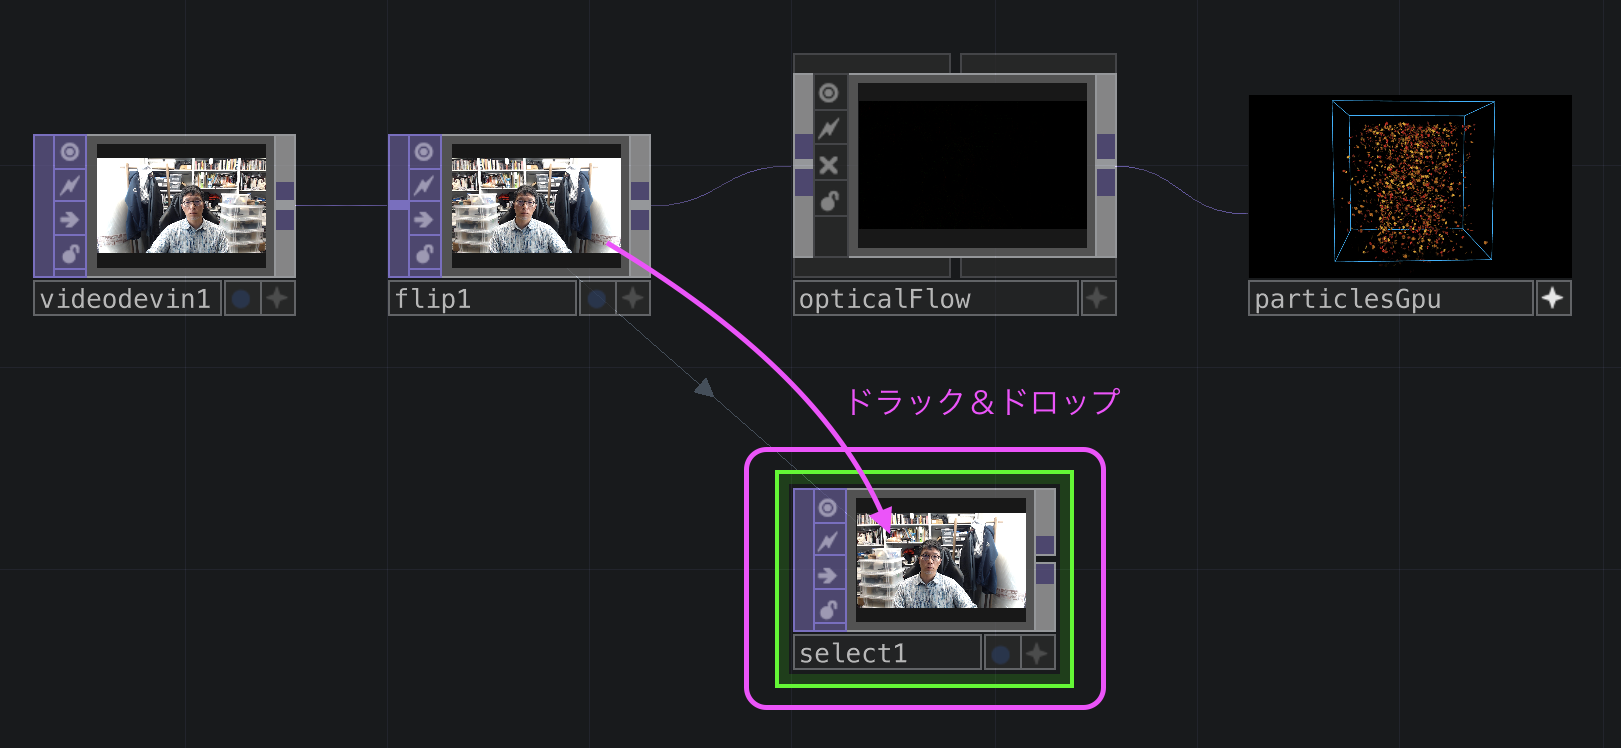
Add Select TOP, drag Flip TOP into it:
7.3 Composite TOP
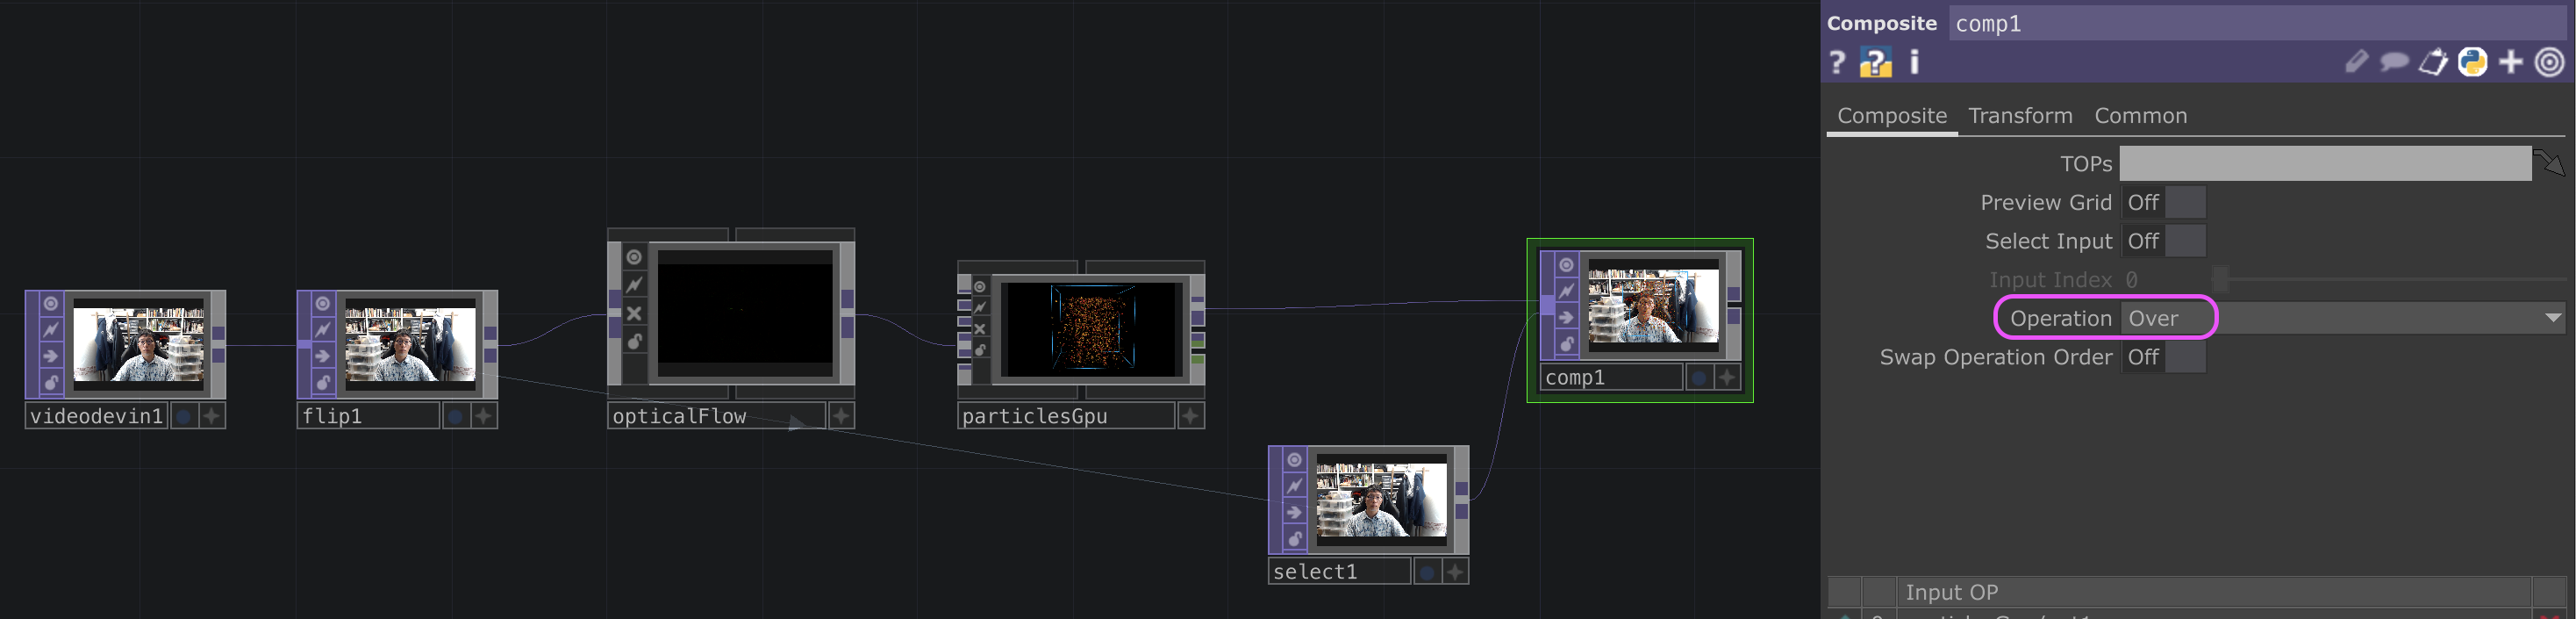
- Add Composite TOP
- particlesGpu Container → Composite TOP
- Select TOP → Composite TOP
- Composite TOP Operation: Over
7.4 Particle position adjustment
- Particle Source tab: keep Shape Line
- In Viewer Active, press
Hthen mouse-adjust:- Middle drag to scale
- Right drag to translate
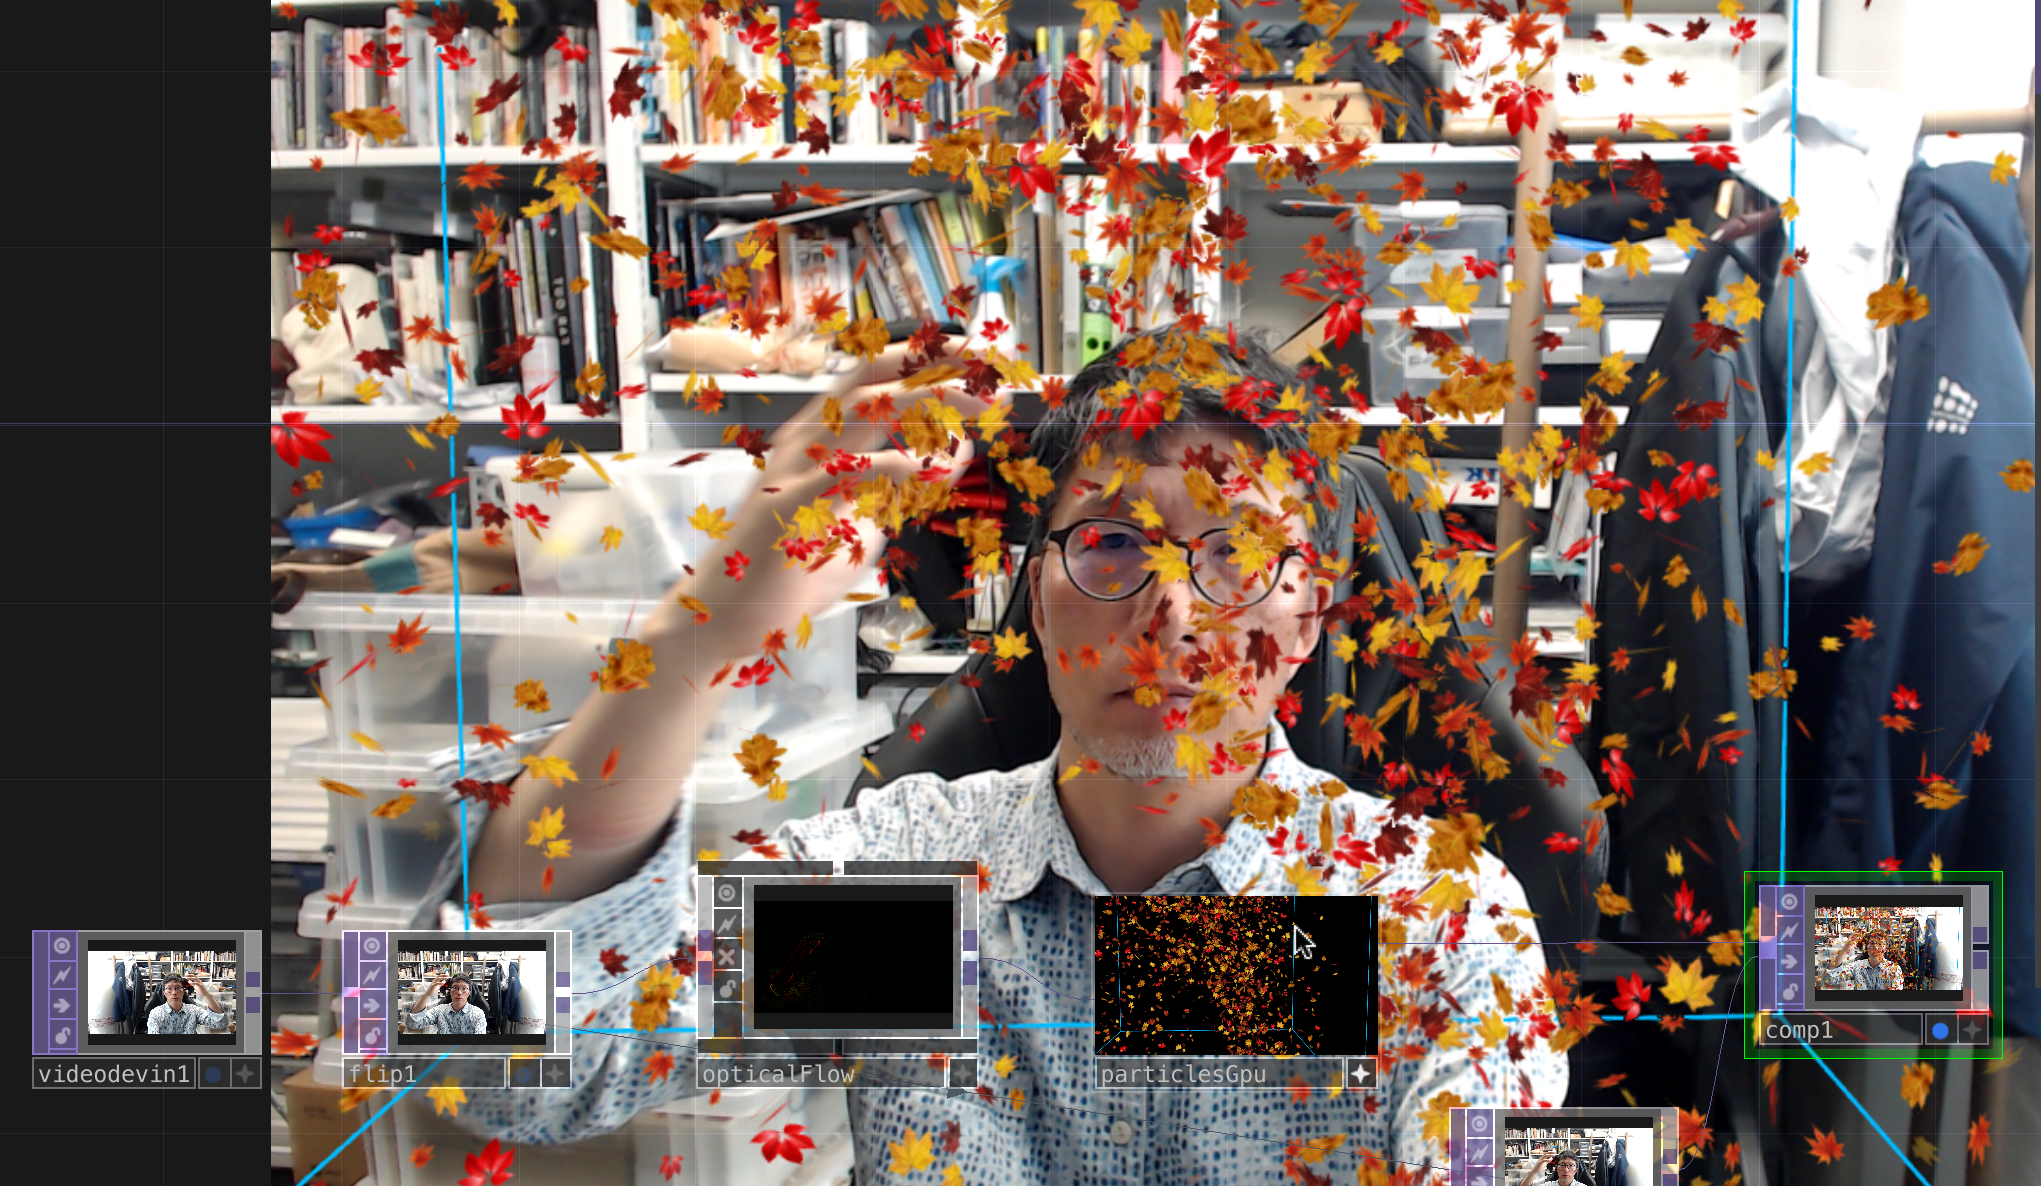
For permanent installations, fix the Bounding Box and emission area with numeric inputs.
7.5 Bounding Box sizing
Match the 16:9 camera:
- ParticlesGPU tab
- Pos Limit Plane:
7 4 4 - Neg Limit Plane:
-7 -4 -4
- Pos Limit Plane:
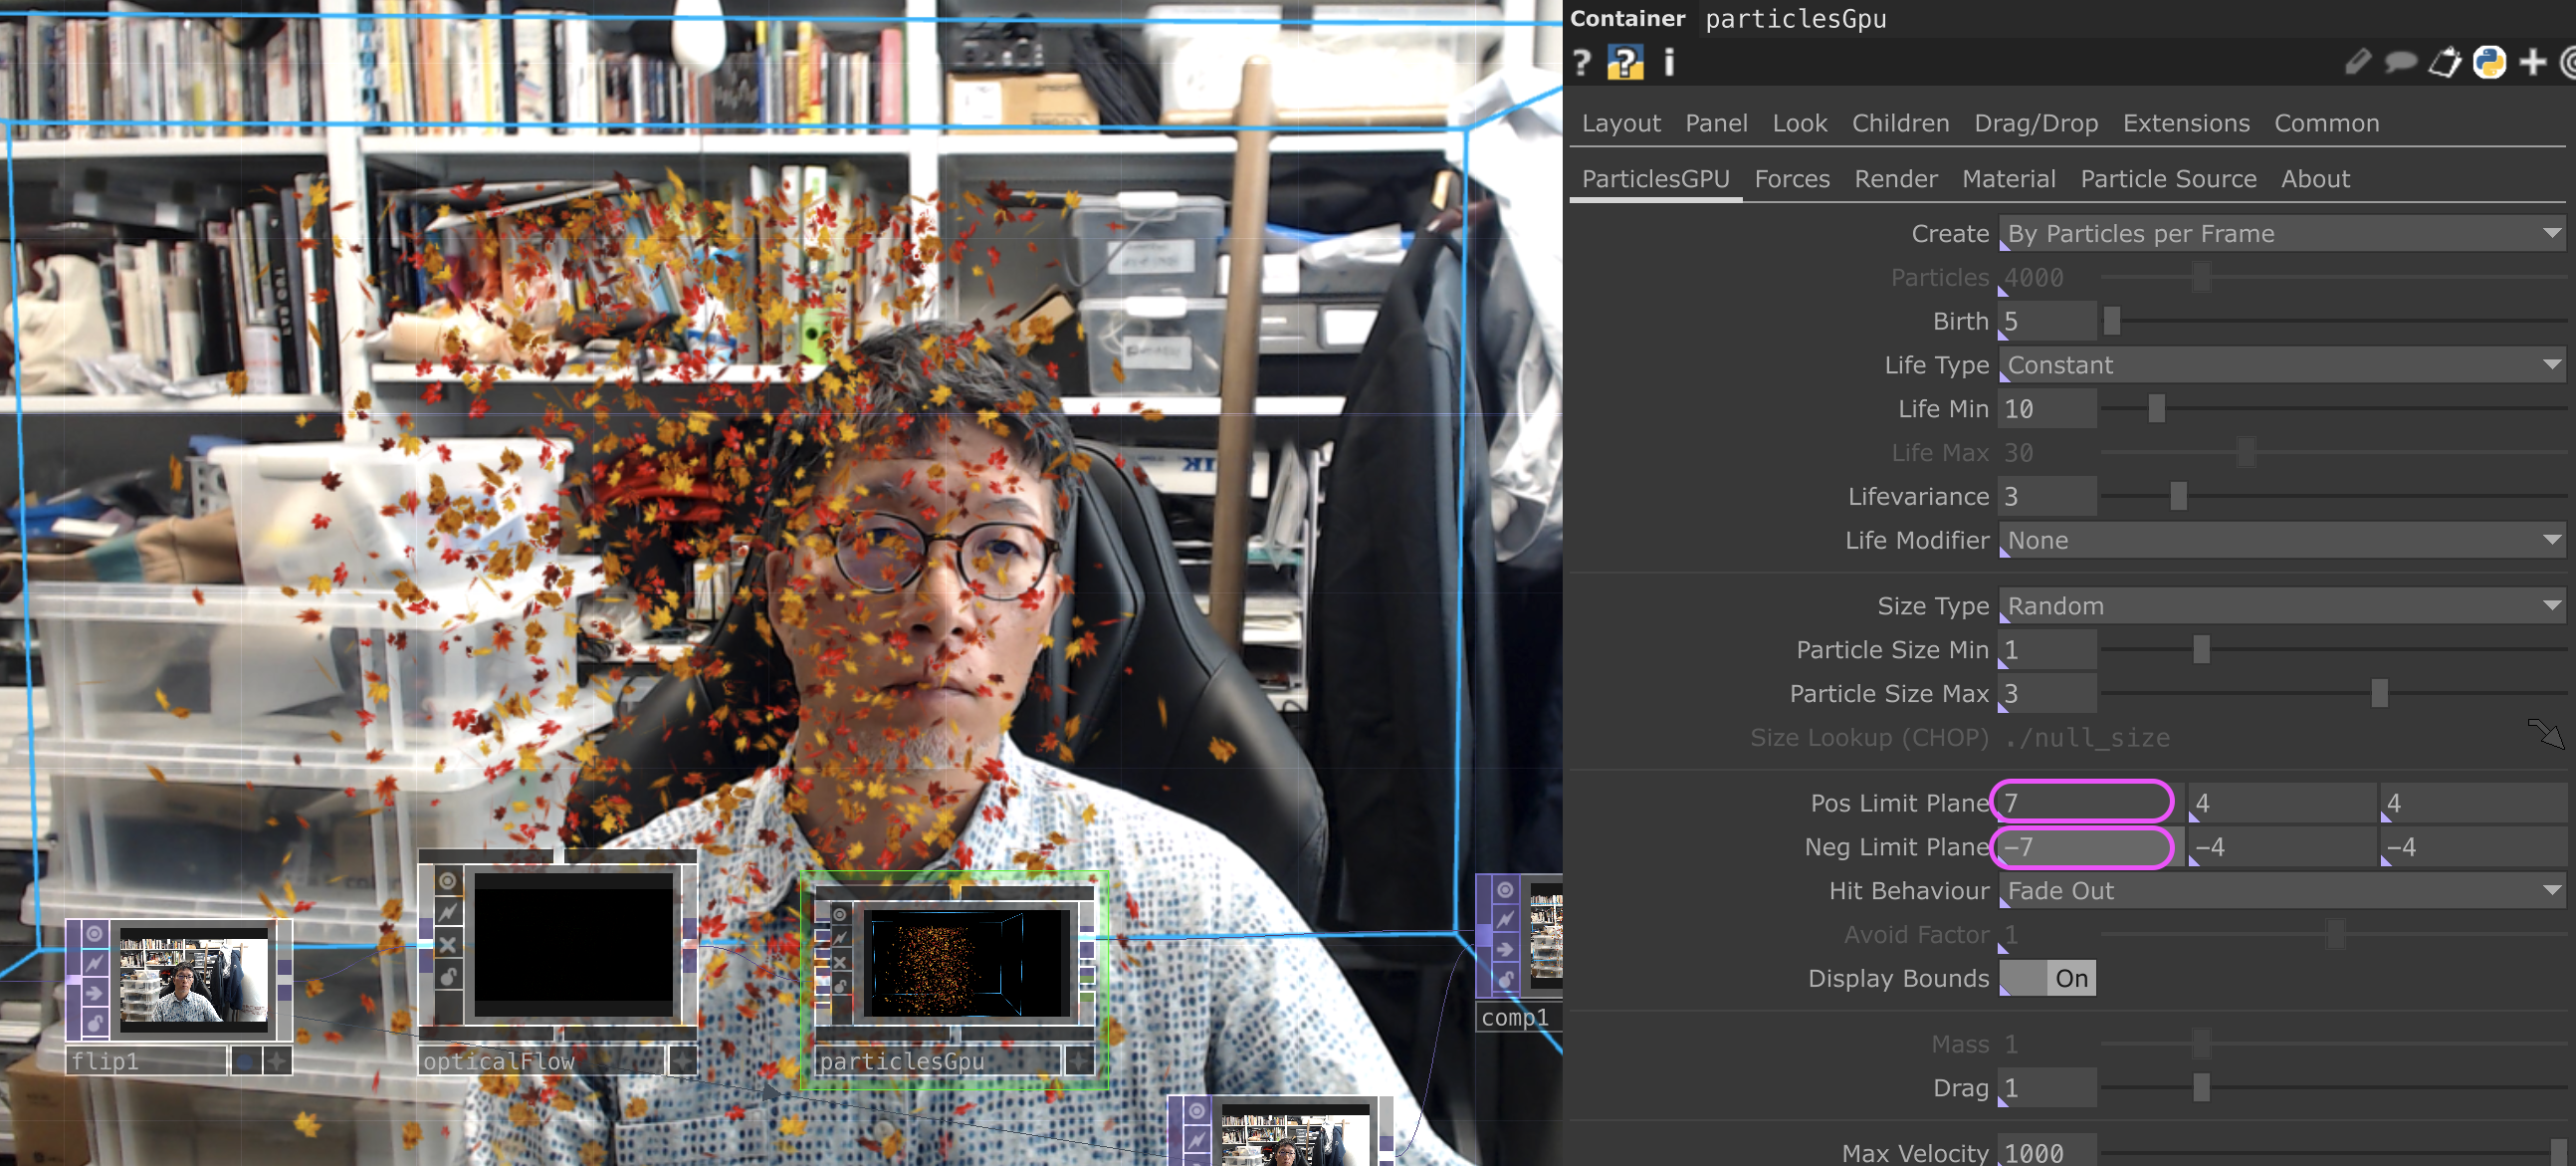
Hit Behaviour default Fade Out fades particles outside the Bounding Box. None disables the bounding-box constraint.
7.6 Emission area sizing
- Particle Source
- PointA:
-7 0 0 - PointB:
7 0 0
- PointA:
Requires Shape: Line.
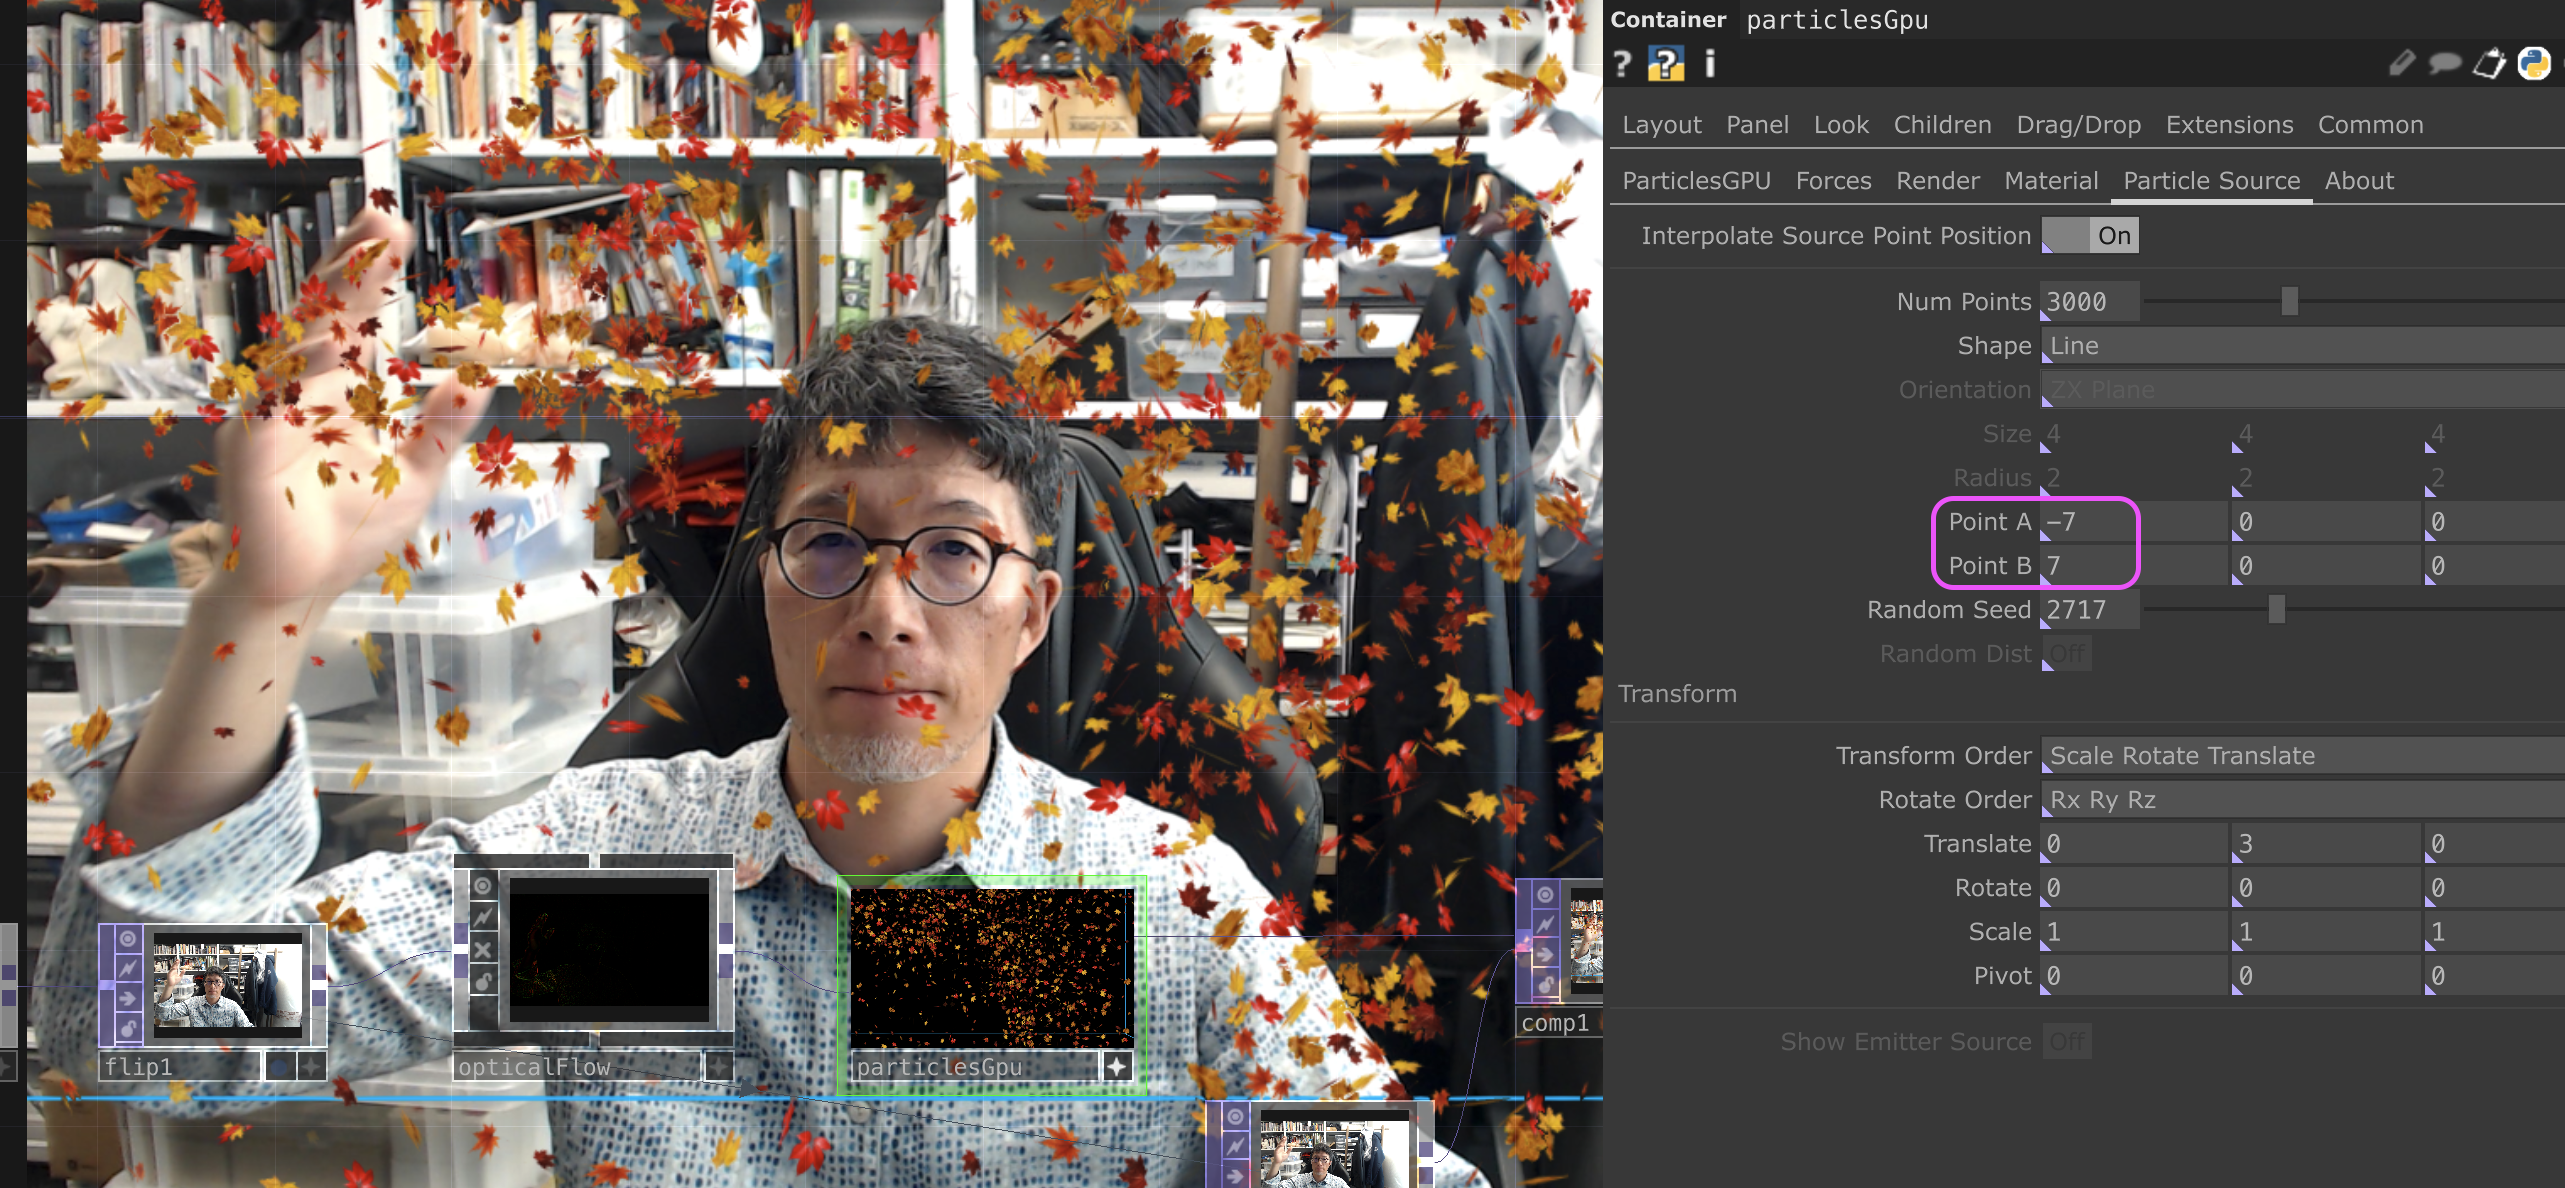
7.7 Toggle Bounding Box display
ParticlesGPU tab > Display Bounds:
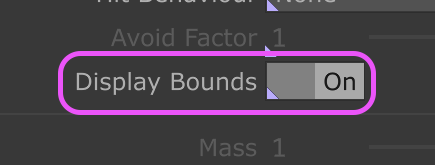
7.8 Map to camera aspect (16:50 in video)
- Forces tab
- Optical Flow Size Remap: 1.77 1
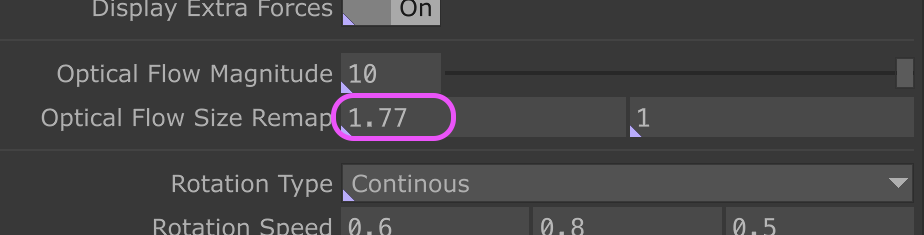
Without this, vertical arm motions produce unexpected ripple effects:
8. Particle Image and Size
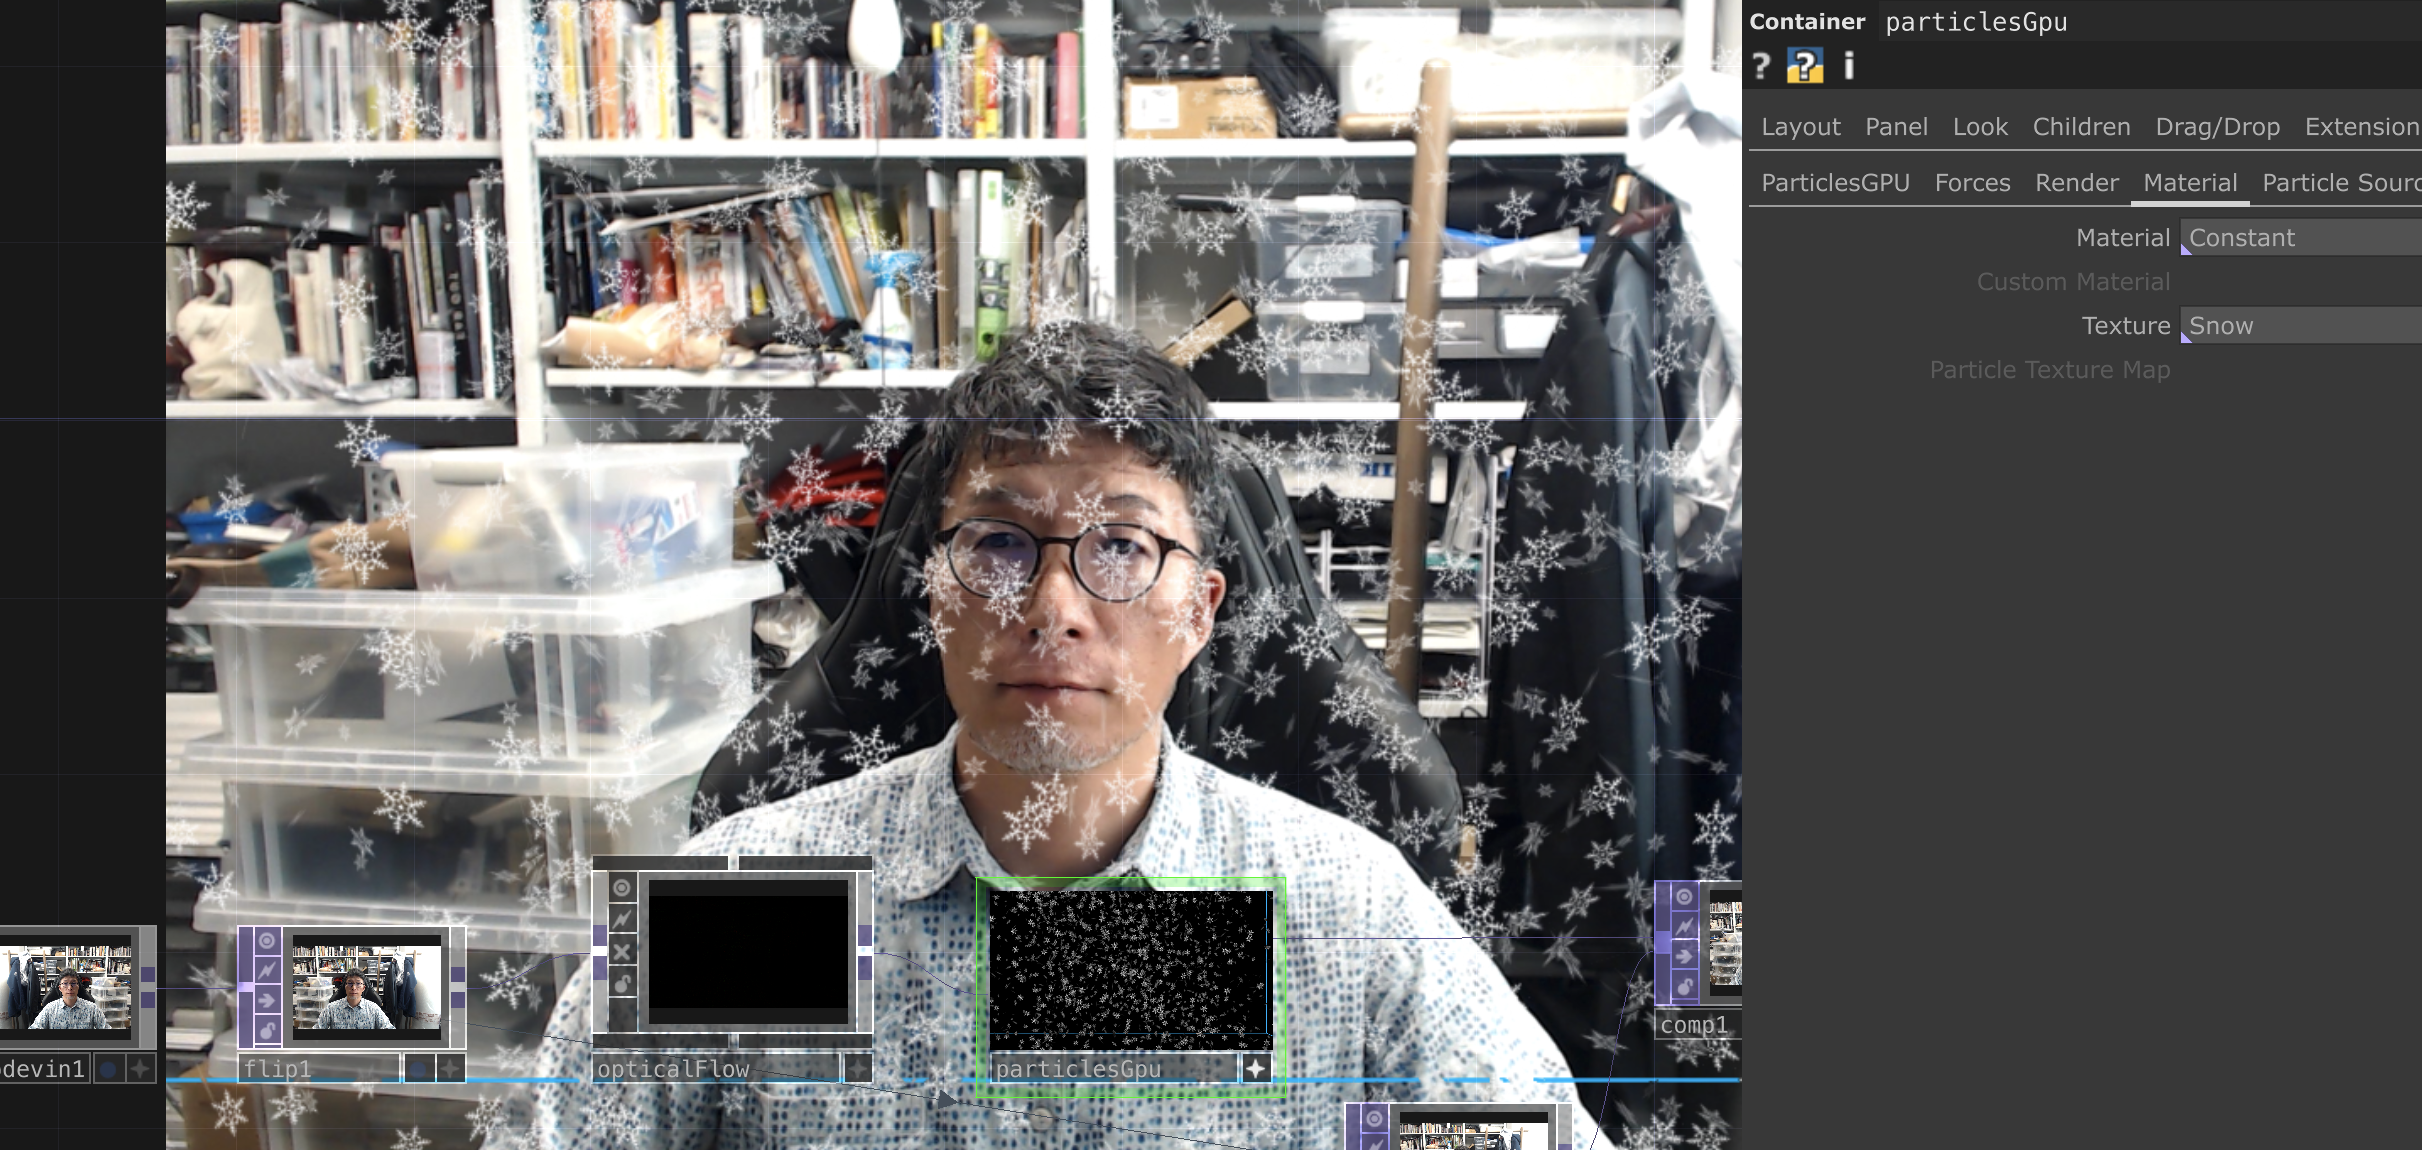
8.1 Built-in textures
Material tab > Texture:
| Preset |
|---|
| Square |
| Circle |
| Snow |
| Leaf (default) |
| Character |
8.2 Custom (banana image)
- Movie File In TOP to load the image
- Fit TOP (matches 1:1 ratio of the Texture)
- Drag Fit TOP onto particlesGpu’s Material tab (Texture: Custom) Particle Texture Map
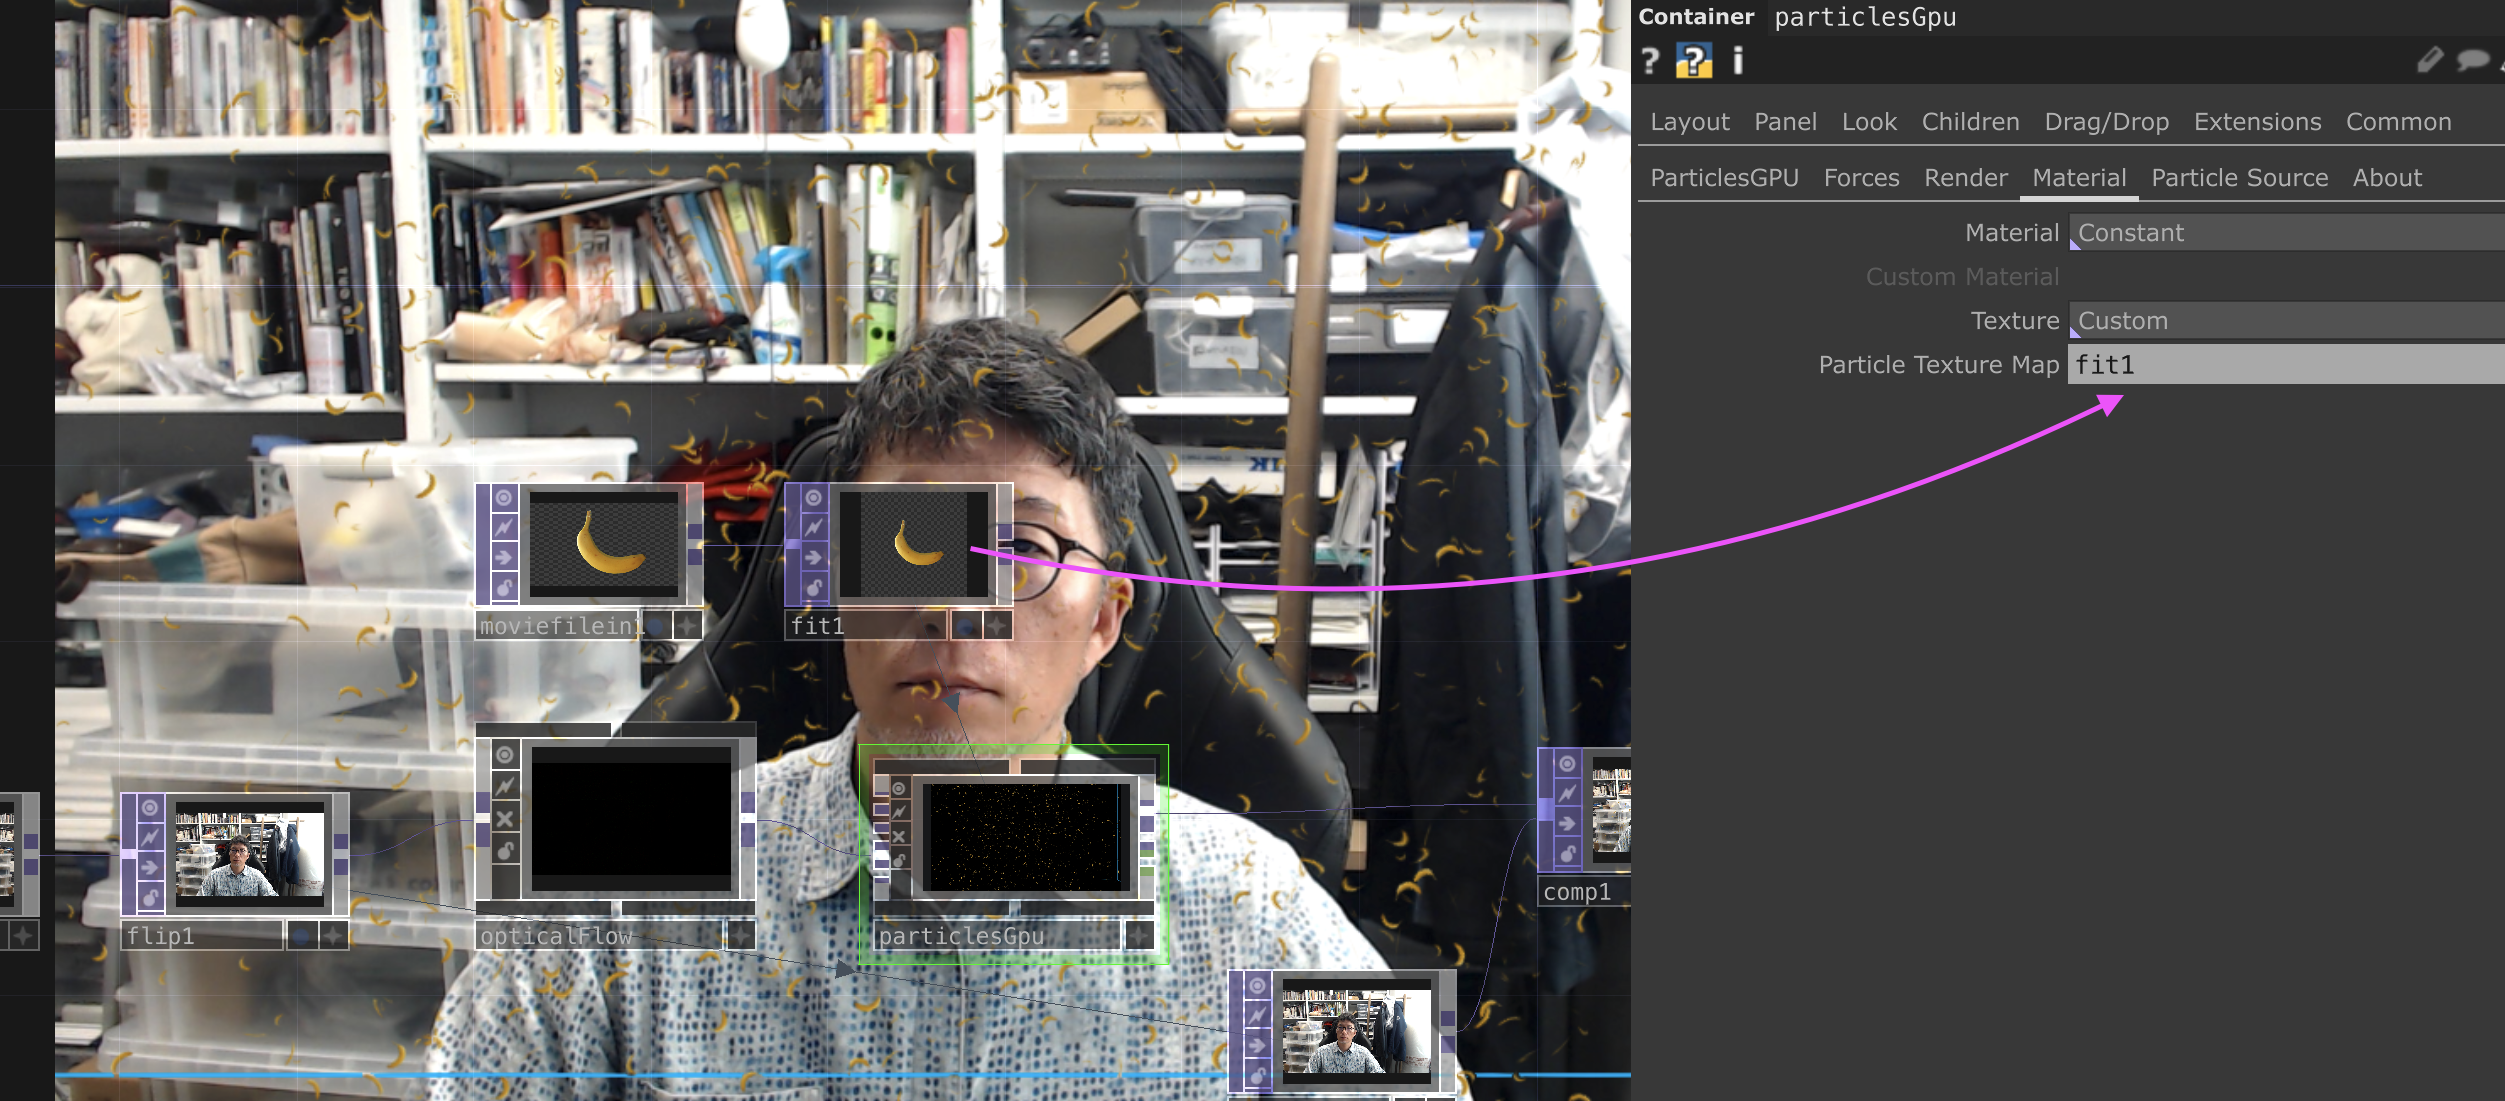
Try with logos too:


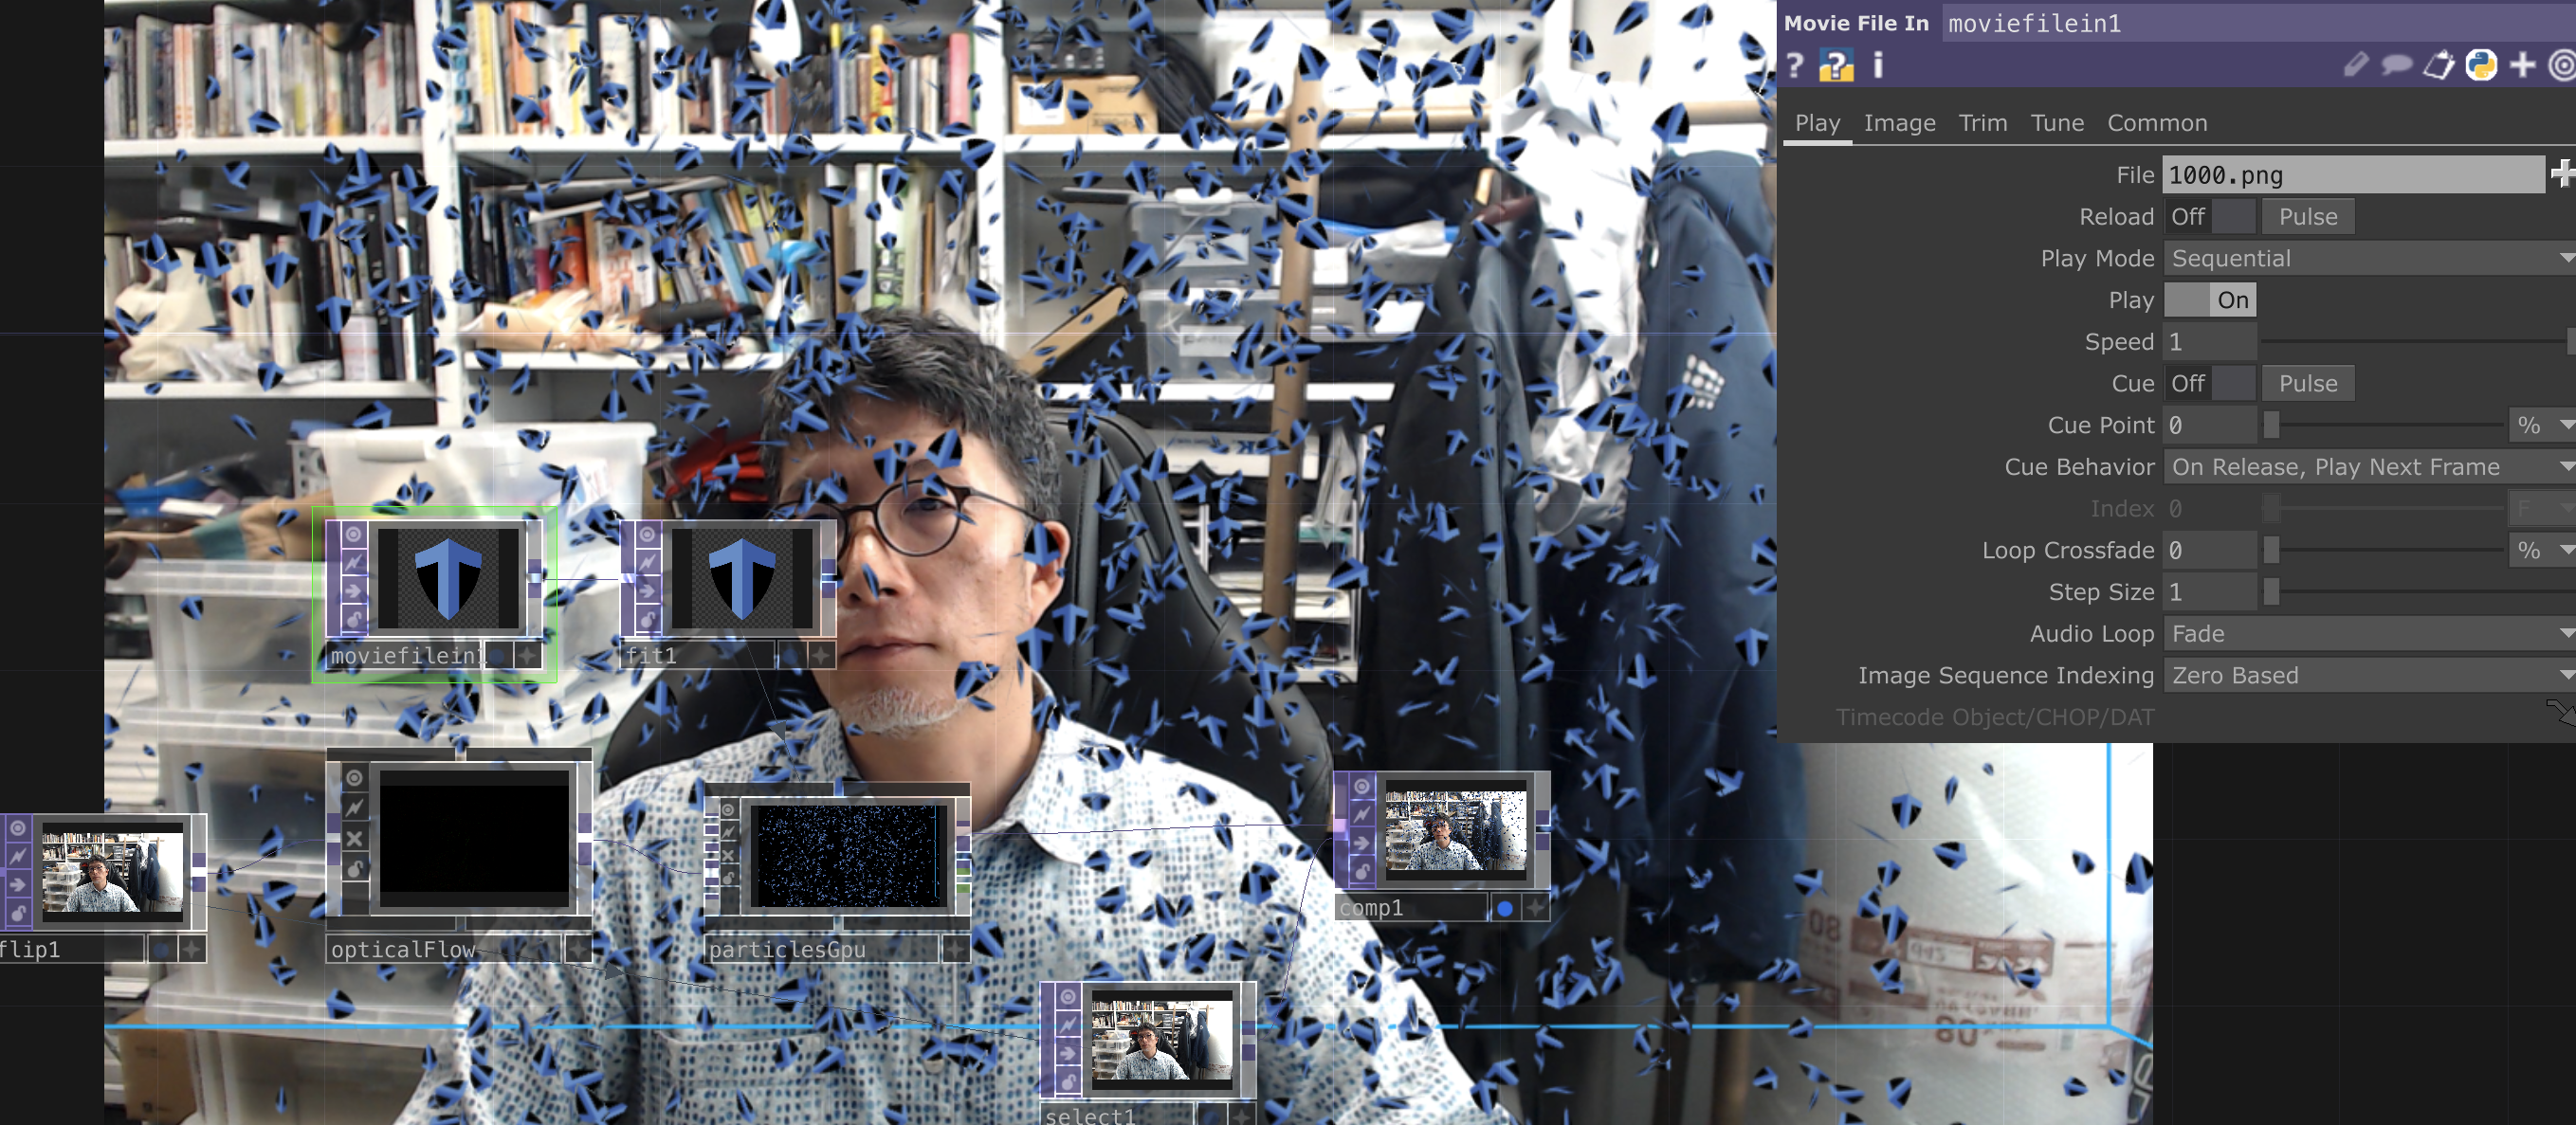
8.3 Color variations (original)
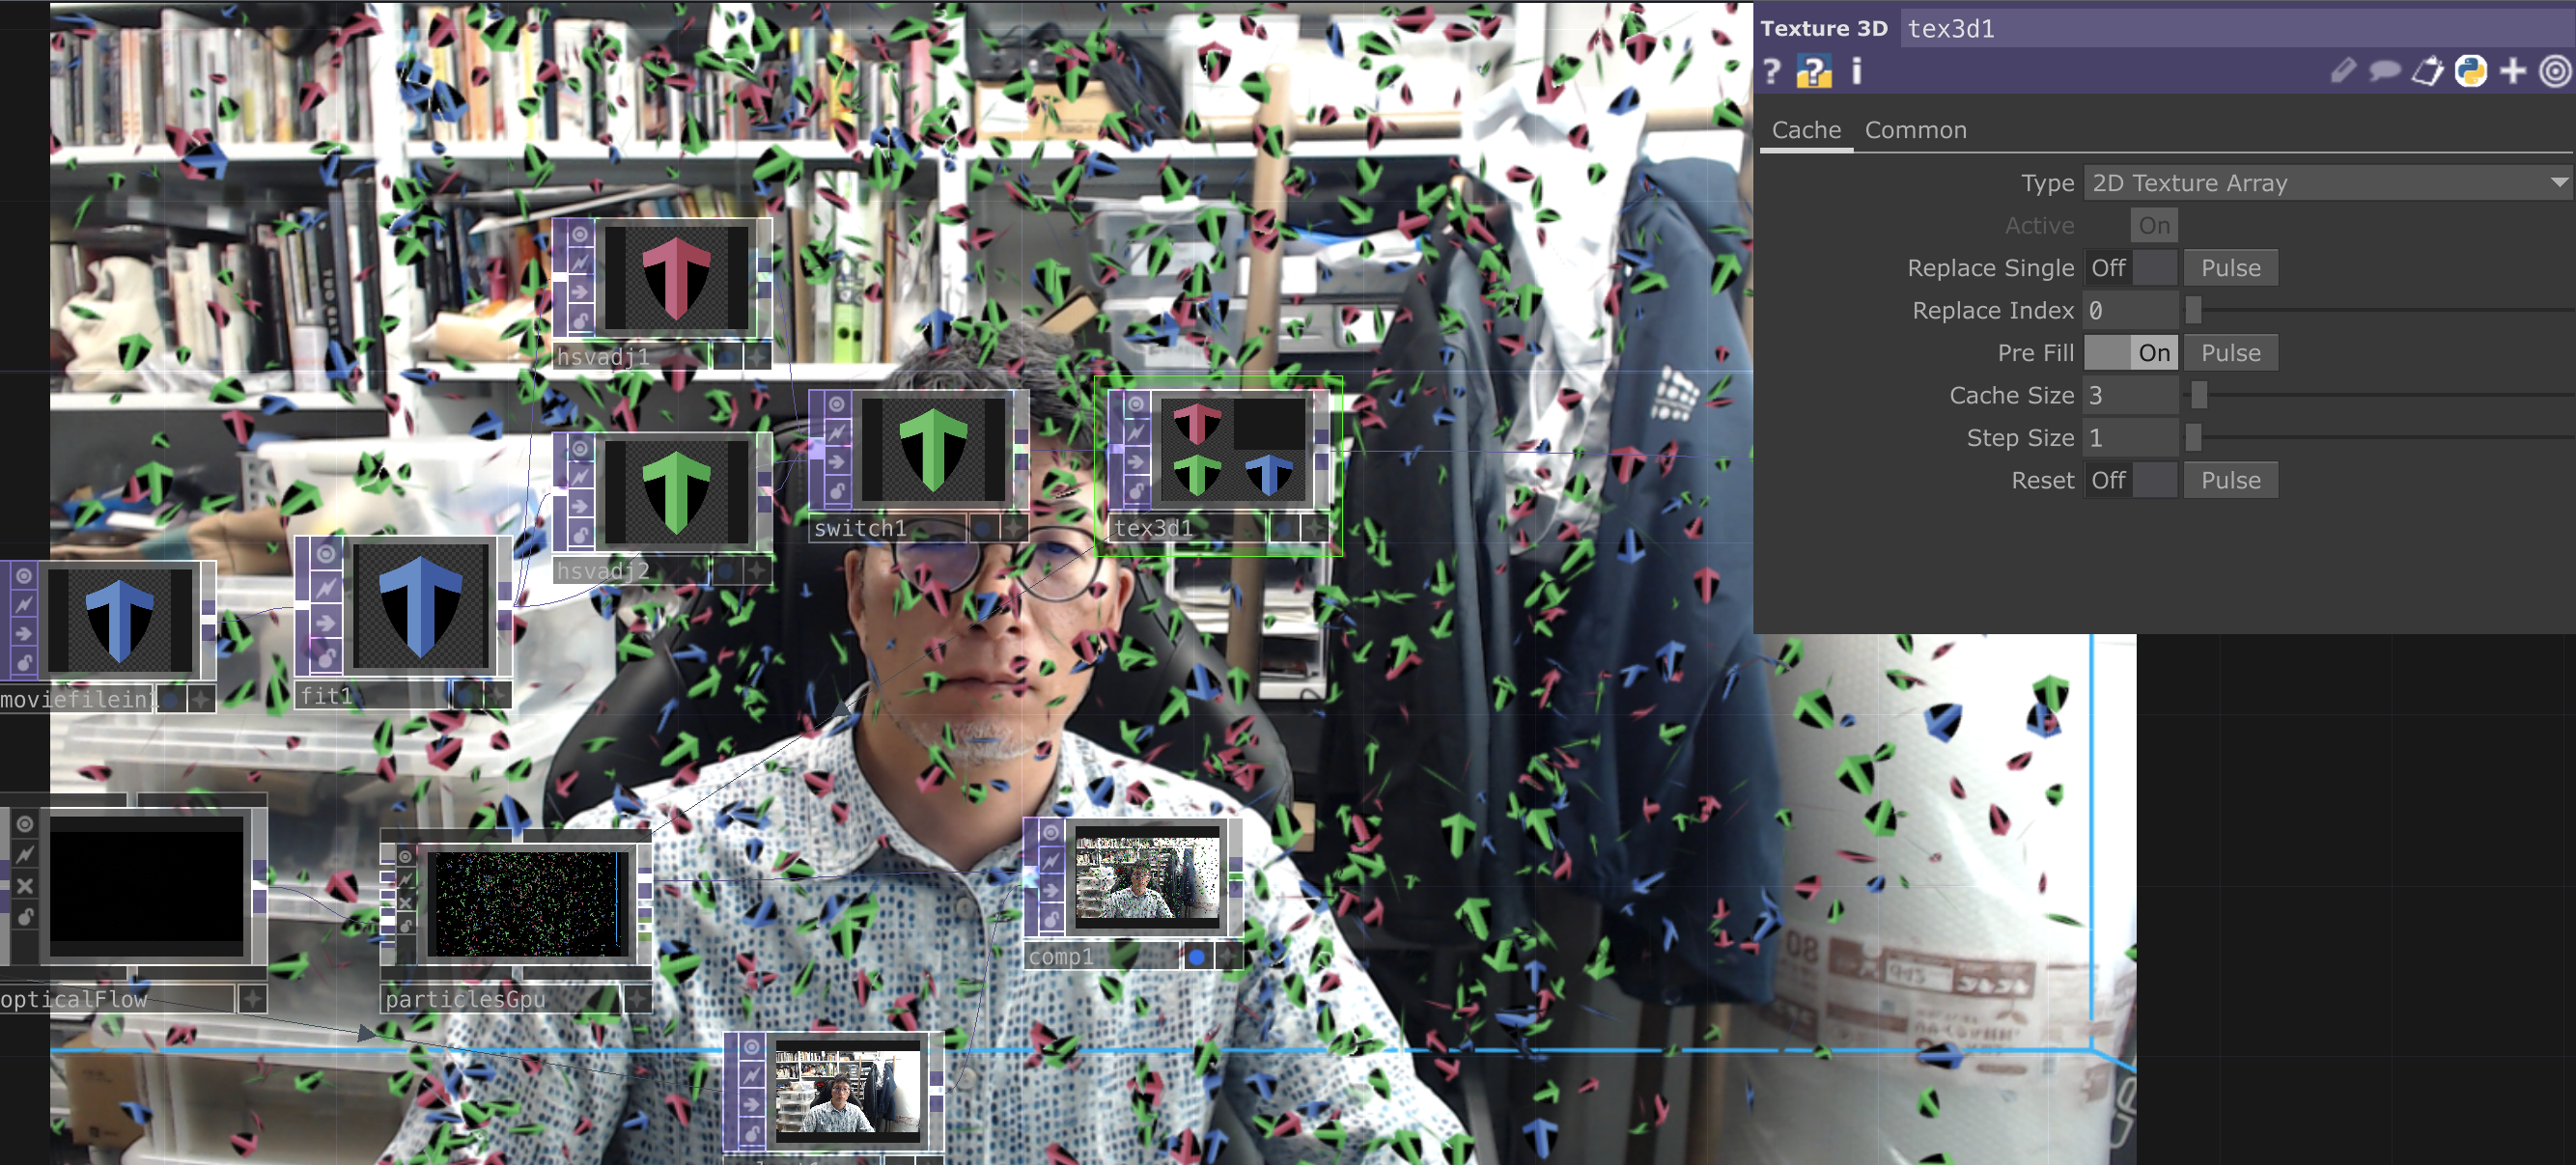
- Keep Movie File In TOP and Fit TOP from 8.2
- Add 2 HSV Adjust TOPs and change Hue Offset
- Switch TOP connecting both HSV Adjusts and Fit TOP (3 inputs)
- Set Switch TOP’s Index to
me.time.frame%3 - Texture 3D TOP:
- Type: 2D Texture Array
- Pre Fill: ON
- Drag Texture 3D TOP into Particle Texture Map
Reference: Interactive Particles – TouchDesigner + Kinect Tutorial 1
8.4 Particle count and size (Snow)
Change Texture to Snow. ParticlesGPU tab:
- Birth: 20
- Particle Size Min: 0.3
- Particle Size Max: 2
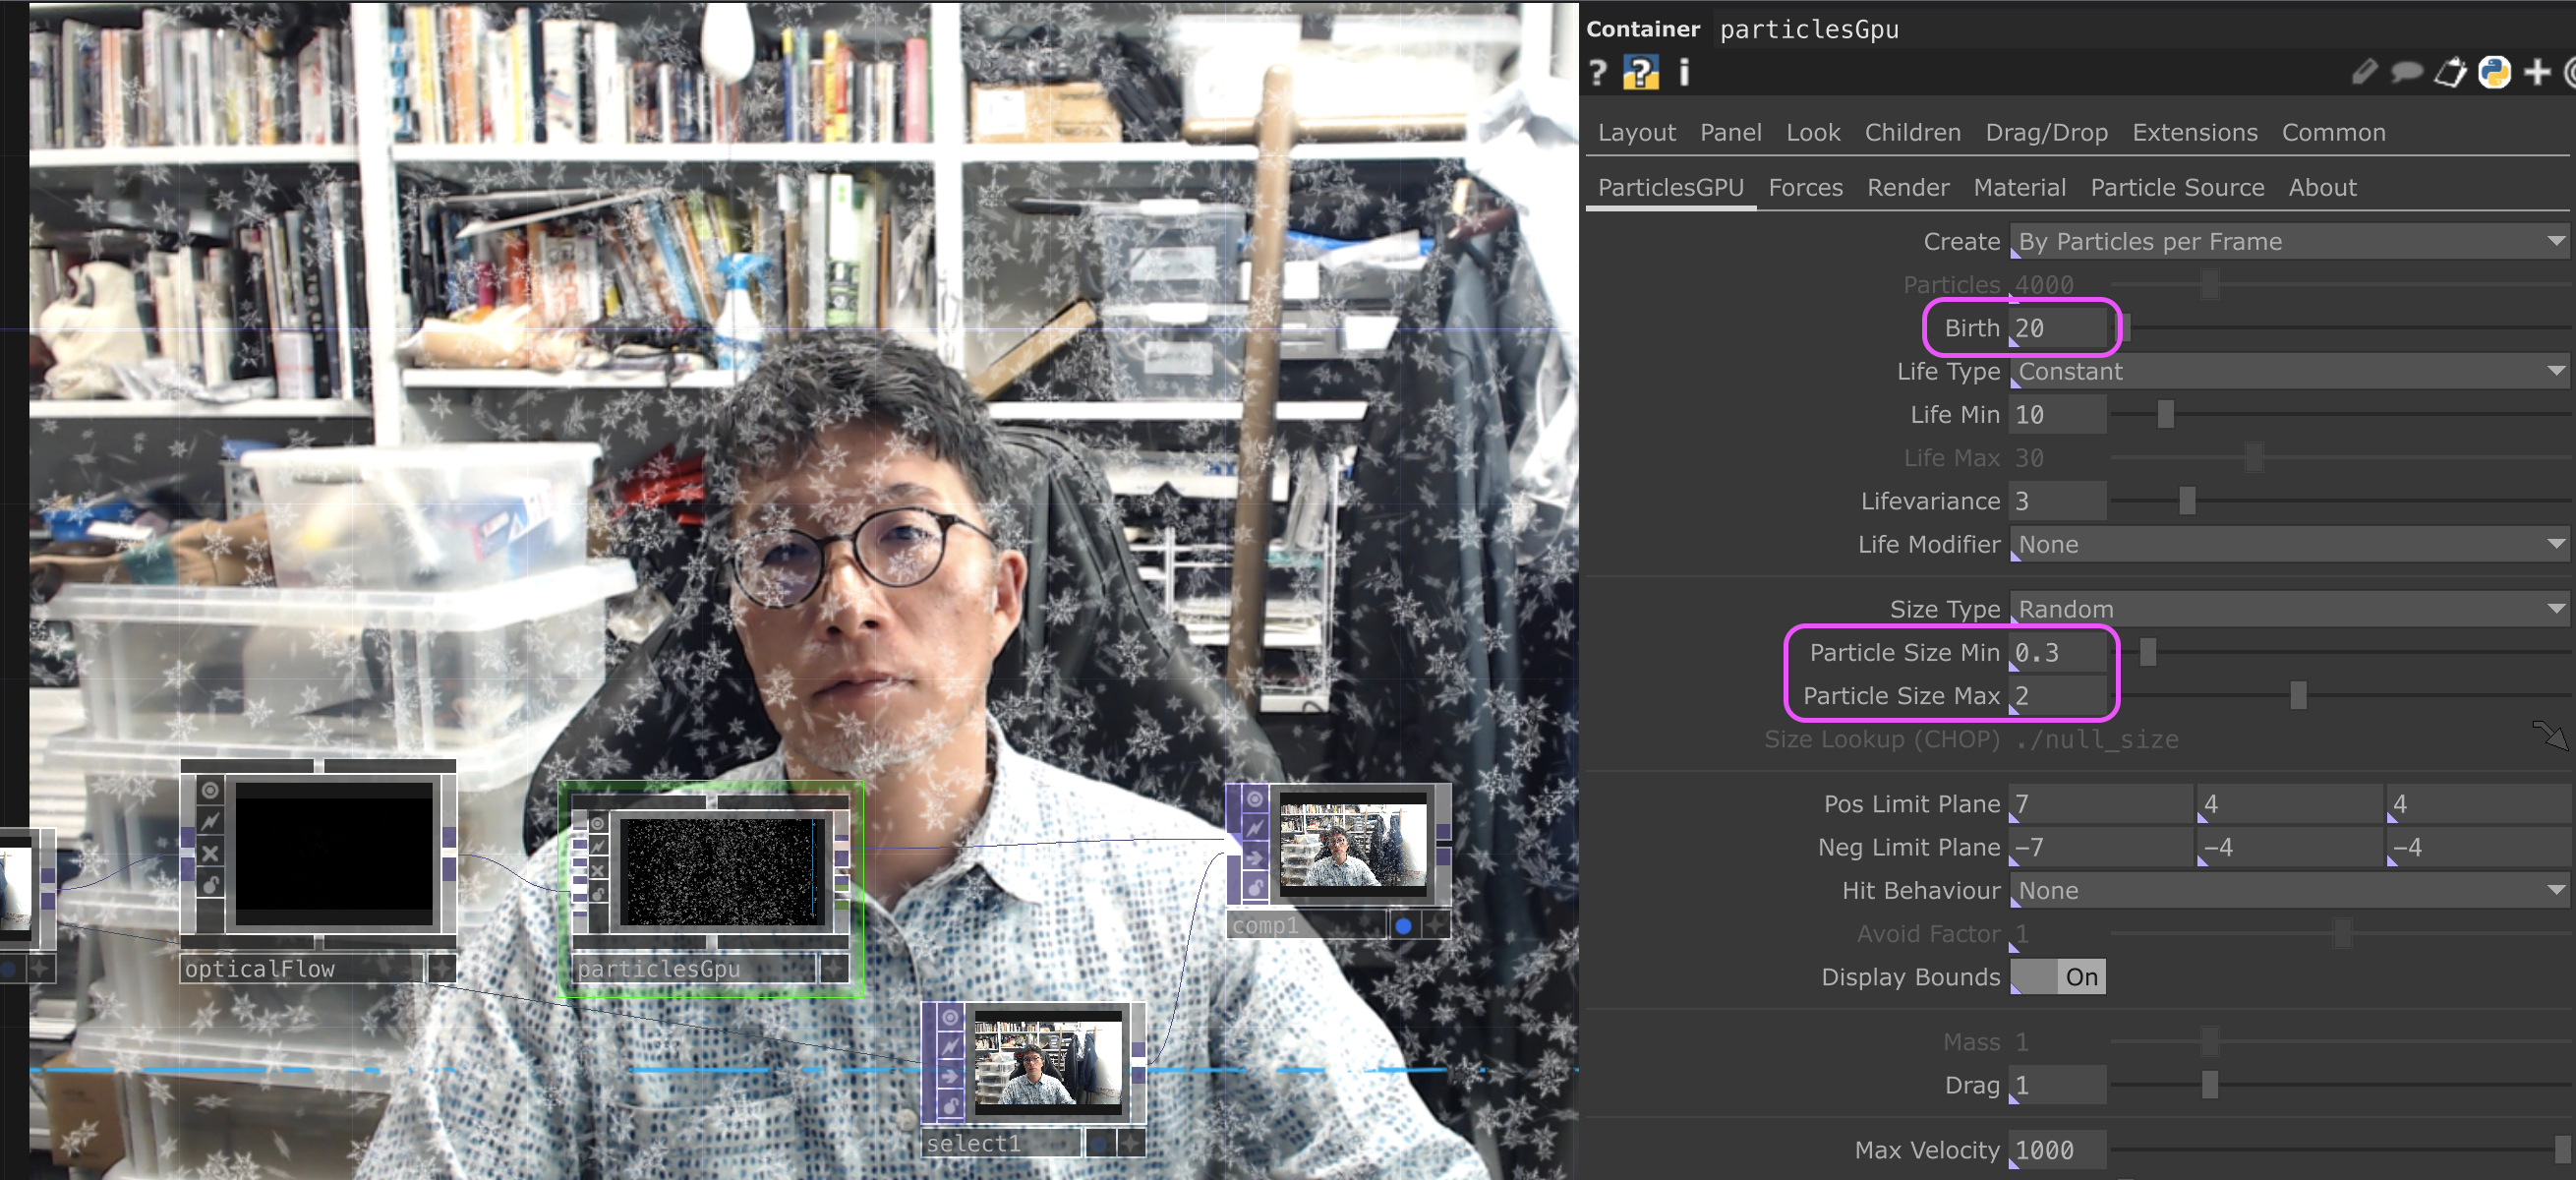
Connect Composite TOP to Out TOP, enter Perform mode for fast playback.
9. Stationary Particles Variant (Original)
9.1 Intro
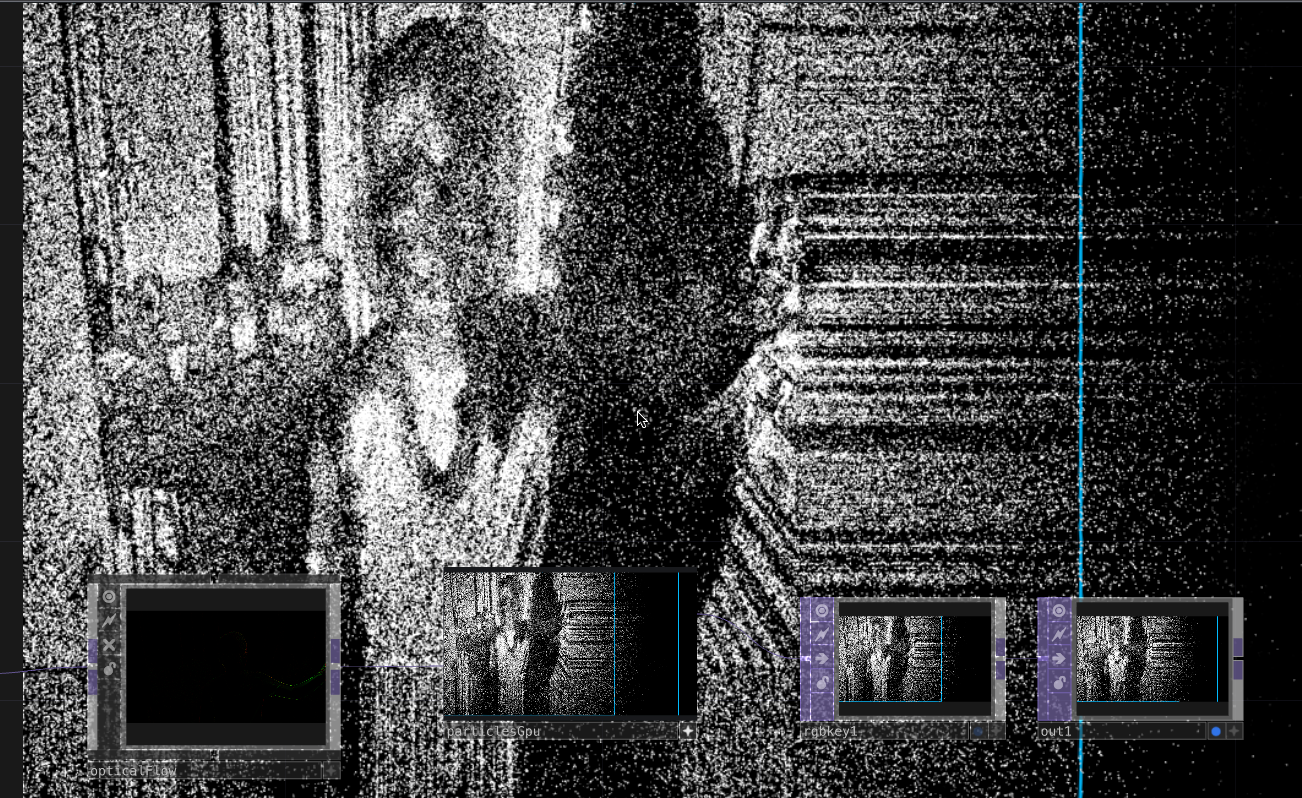
A new variant using ParticlesGPU — instead of falling, particles remain stationary on screen, useful for floor projection:
9.2 Launch TouchDesigner
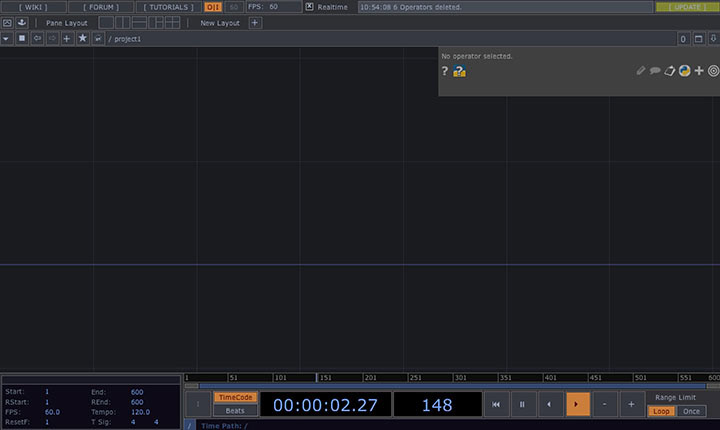
Delete startup operator, close Palette:
9.3 Operator setup
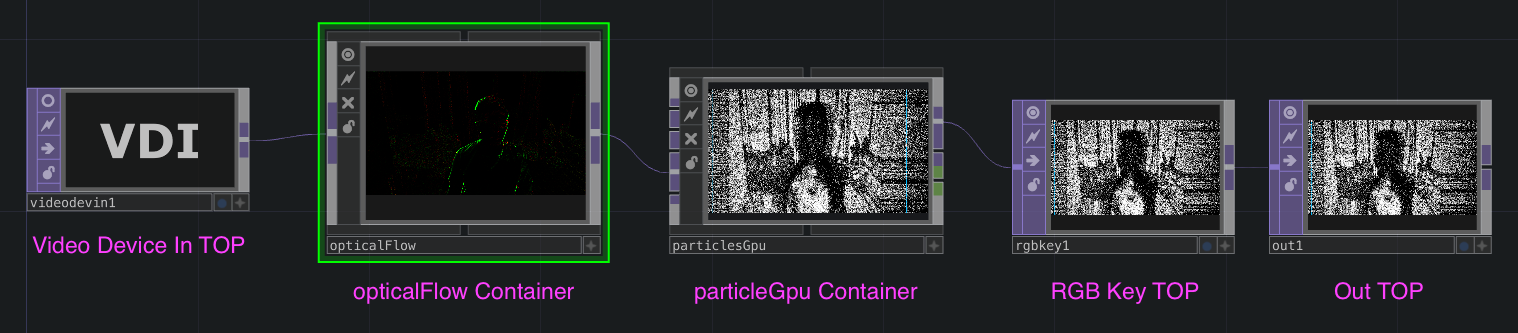
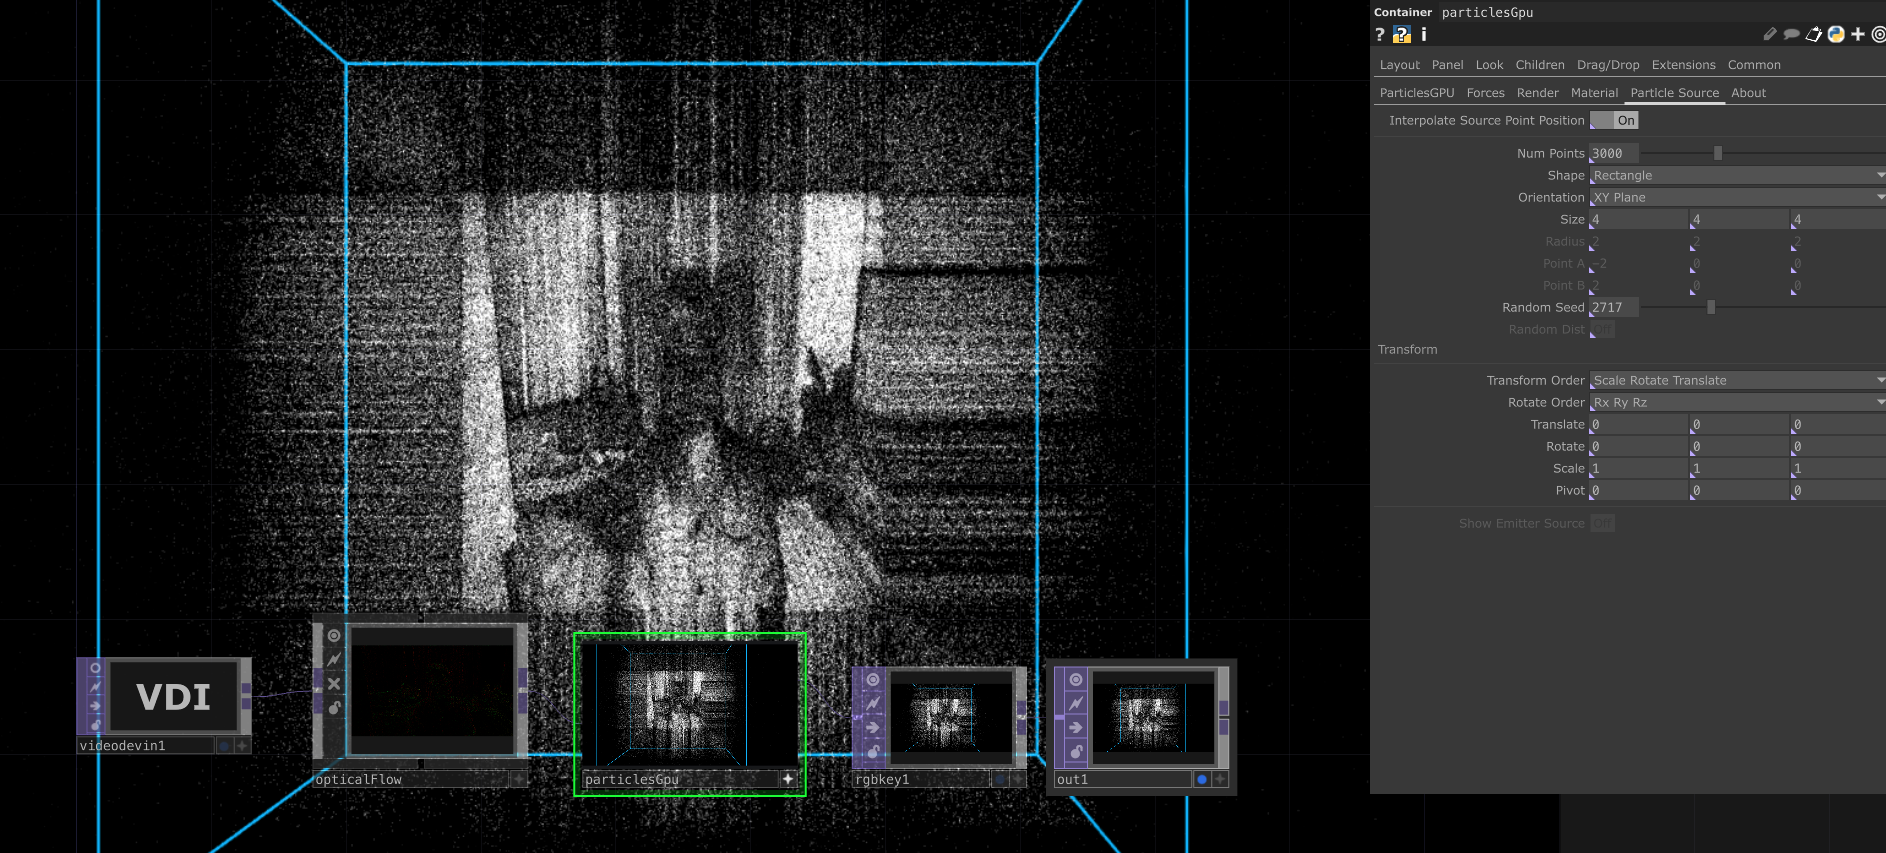
Wire as shown:
9.4 particlesGpu Container parameters
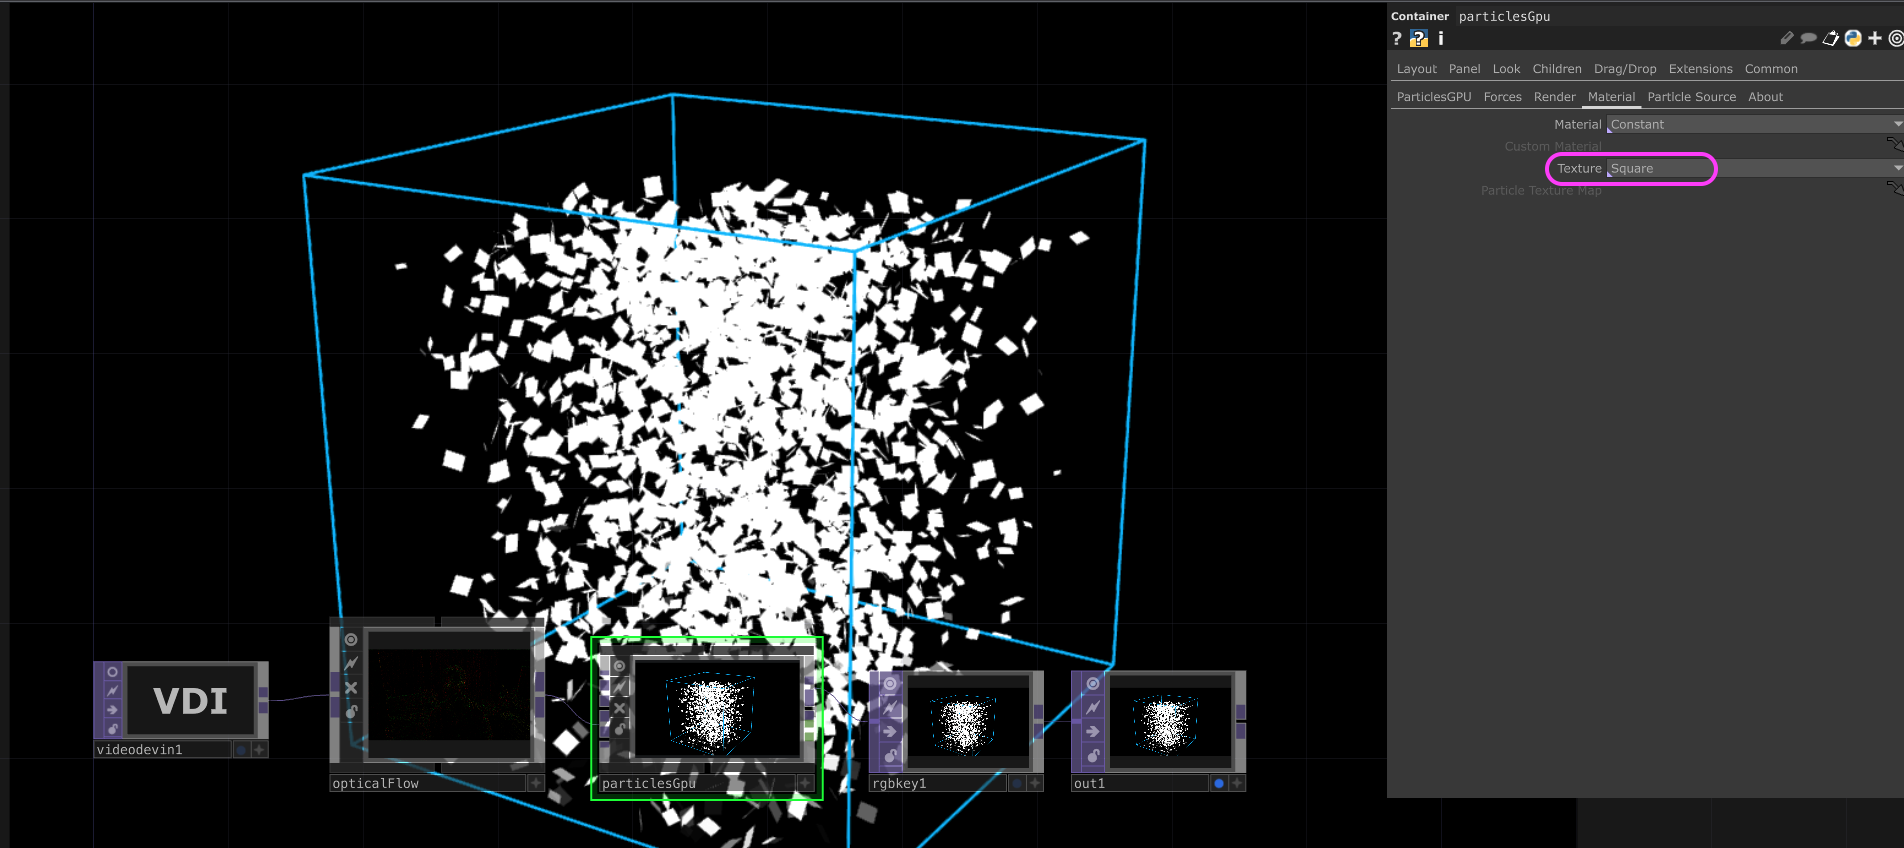
Material tab:
- Texture: Square (lightweight)
Forces tab:
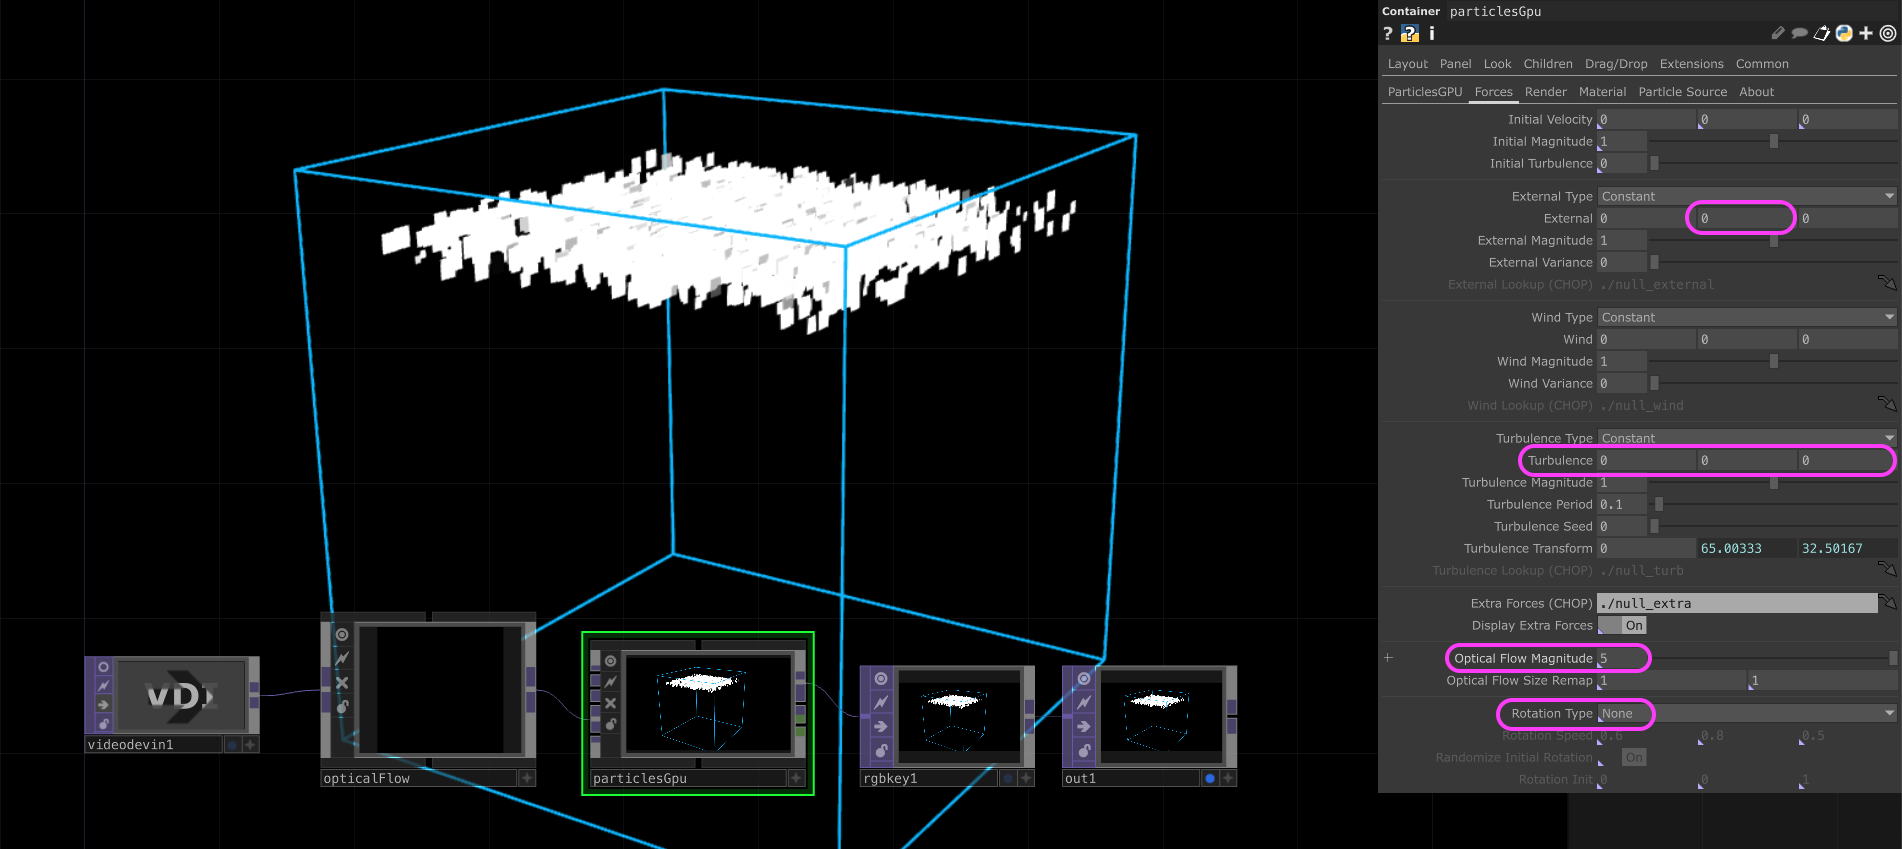
- External:
0 0 0(gravity) - Turbulence:
0 0 0 - Optical Flow Magnitude: 5 (interaction strength)
- Rotation Type: None
ParticlesGPU tab:
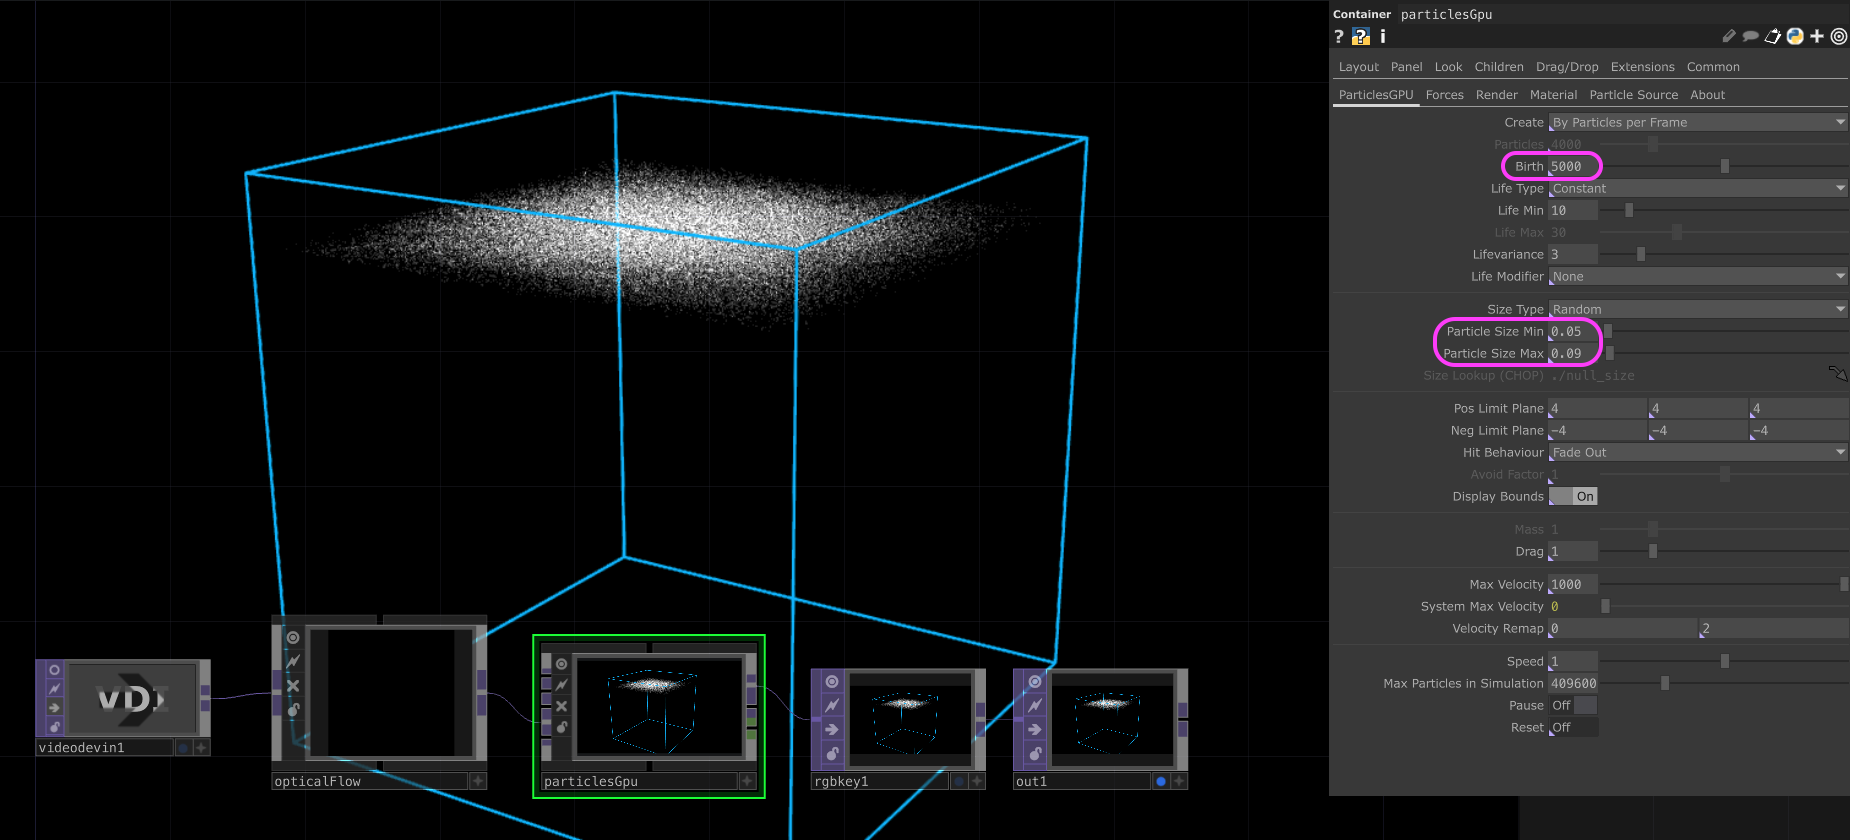
- Birth: 5000
- Particle Size Min: 0.05
- Particle Size Max: 0.09
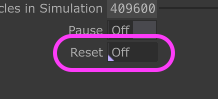
The Reset button clears accumulated particles. Useful because particle-life means changes don’t show until existing particles expire:
Particle Source tab:
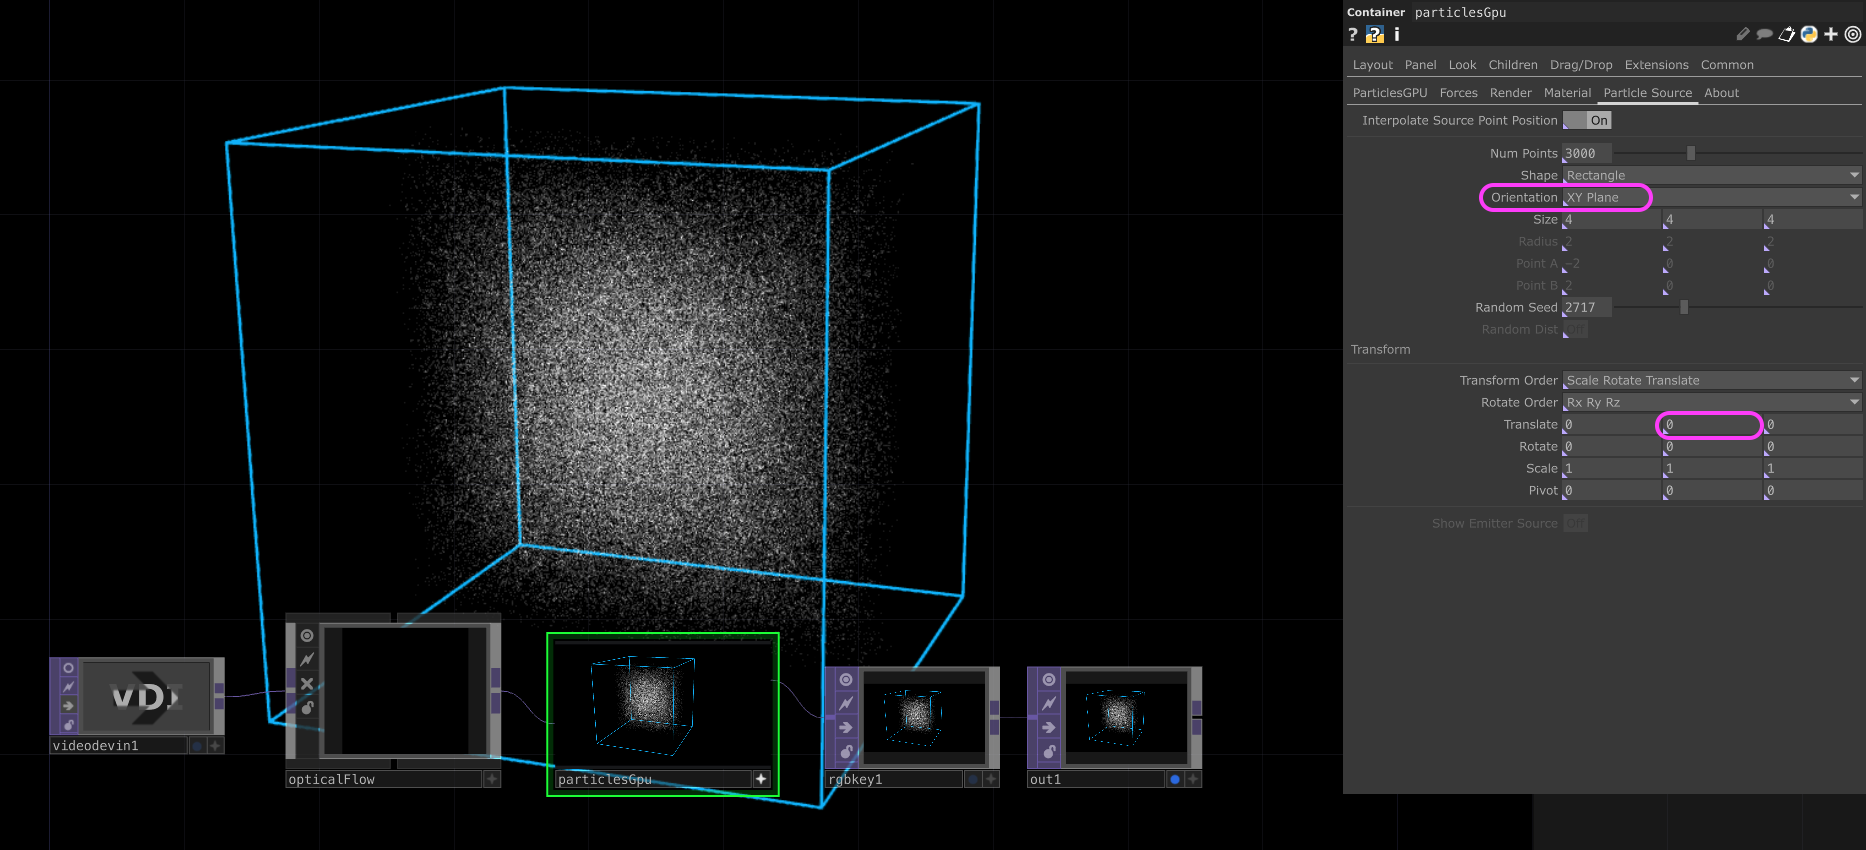
- Orientation: XY Plane
- Translate:
0 0 0
Coordinate orientation reference:
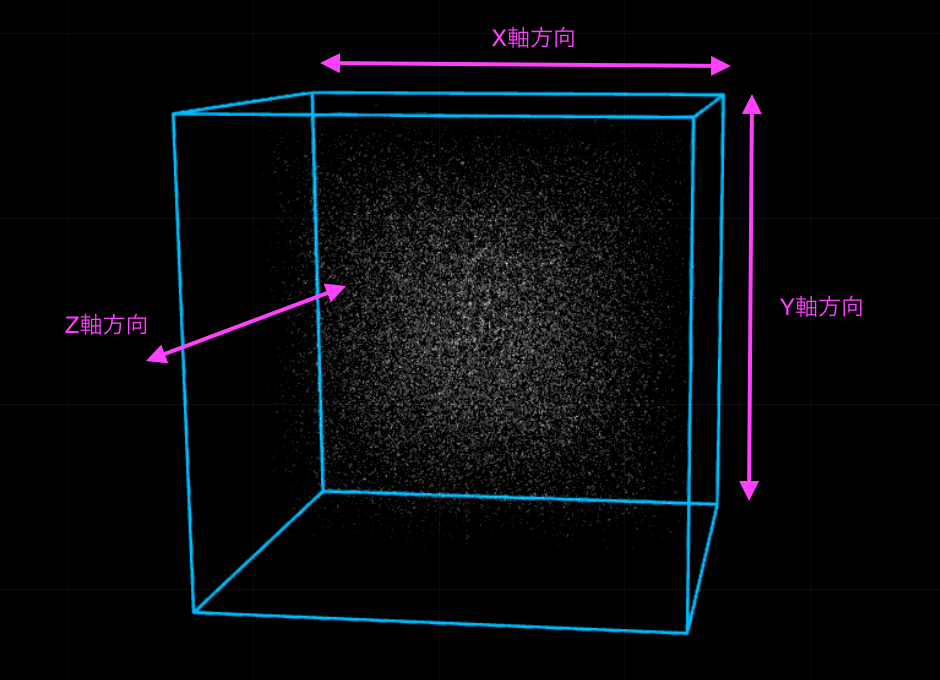
In Viewer Active press H for front view, then scale to fit:
10. Recommended Gear
Specs that matter for this setup:
- GPU: more particles → more VRAM. 12 GB or more is a comfortable target (RTX 4070 SUPER / RTX 5070 class).
- Webcam: Optical Flow accuracy tracks camera quality directly. 1080p minimum, ideally 4K (Logitech Brio family etc.).
- Projector (for floor projection): short-throw + 4K suits installation work (EPSON EB series, BenQ short-throw line, etc.).